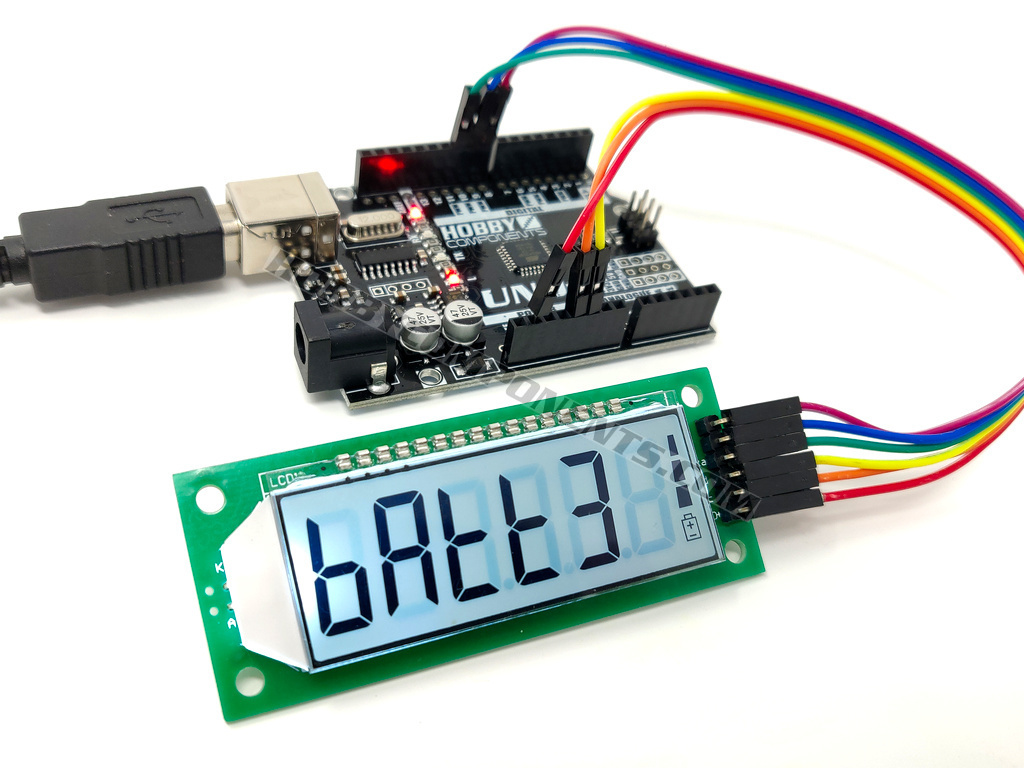

This item is a 6 digit 7-segment LCD display module. It features large black LCD digits displayed against a white backlight resulting in a clear and easy to read display. Communication to the module is via a 5V serial interface requiring only 3 digital pins (CS, WR, Data). Additionally, this 6 digit display module also features a 3 state battery charge icon.


For Arduino users we have also written an exclusive library (HCDisplay) which will help you develop your project with the minimum of effort. This library can be downloaded from the support section of our support forum here:
viewtopic.php?f=58&t=2827
Hobby components notes: Although this module can display numbers up to 6 digits, for fractional numbers only the 3 right most digits are capable of displaying a decimal point.
Specification:
Product code: HCMODU0152
Display type: 6 digit 7-segment LCD
Backlight: White
Interface: 3 wire serial SPI
Driver: HT1621
Supply voltage: 4.7-5.2VDC
Supply current: 0.4mA without backlight, 4mA with backlight
Note: Screen in video below is the green backlit version (HCMODU0136).
Example Arduino Sketch:
- /* FILE: HCDisplay_HT1621_Example
- DATE: 20/12/18
- VERSION: 0.1
- AUTHOR: Andrew Davies
- 20/12/18 version 0.1: Original version
- This example sketch demonstrates how to control the HT1621 using the HCDisplay
- library. This sketch supports the following display:
- HT1621 6 Digit 7 Segment LCD Module - Green Backlight (SKU: HCMODU0136)
- HT1621 6 Digit 7 Segment LCD Module - White Backlight (SKU: HCMODU0152)
- Connect the module to your Arduino as follows:
- MODULE............UNO/NANO
- CS................8
- WR................9
- Data..............10
- Gnd...............GND
- Vcc...............5V
- LED...............5V
- NOTE: TO USE THIS SKETCH YOU MUST FIRST SELECT THE VERSION OF DISPLAY YOU HAVE BY
- UNCOMMENTING THE APPROPRIATE LINE IN THE OPTIONS.H FILE WHICH CAN BE FOUND IN THE
- HCDISPLAY LIBRARY FOLDER. For windows users avoid using the Windows Notepad editor
- as it doesn't format things properly.
- More information about this library can be found in the software section of our
- support forum here:
- http://forum.hobbycomponents.com/software
- You may copy, alter and reuse this code in any way you like, but please leave
- reference to HobbyComponents.com in your comments if you redistribute this code.
- This software may not be used directly for the purpose of selling products that
- directly compete with Hobby Components Ltd's own range of products.
- THIS SOFTWARE IS PROVIDED "AS IS". HOBBY COMPONENTS MAKES NO WARRANTIES, WHETHER
- EXPRESS, IMPLIED OR STATUTORY, INCLUDING, BUT NOT LIMITED TO, IMPLIED WARRANTIES OF
- MERCHANTABILITY AND FITNESS FOR A PARTICULAR PURPOSE, ACCURACY OR LACK OF NEGLIGENCE.
- HOBBY COMPONENTS SHALL NOT, IN ANY CIRCUMSTANCES, BE LIABLE FOR ANY DAMAGES,
- INCLUDING, BUT NOT LIMITED TO, SPECIAL, INCIDENTAL OR CONSEQUENTIAL DAMAGES FOR ANY
- REASON WHATSOEVER. */
- #include "HCDisplay.h"
- #define CS 8 //Digital pin used to connect to the modules CS pin
- #define WR 9 //Digital pin used to connect to the modules WR pin
- #define DATA 10 //Digital pin used to connect to the modules Data pin
- HCDisplay HCDisplay; //Creates an instance of the HCDisplay library
- void setup()
- {
- HCDisplay.Init(CS, WR, DATA); //Initialise the display
- }
- void loop()
- {
- ScrollText("Hello World ");
- ScrollText("Hobby Components HT1621 ");
- CountDown(10);
- HCDisplay.Clear();
- // Cycle though all 4 battery level states
- for(byte i = 0; i < 10; i++)
- for(byte Level = 0; Level < 4; Level++)
- {
- HCDisplay.Pos(0);
- HCDisplay.Print("BATT");
- HCDisplay.Print(Level);
- Battery(Level);
- delay(1000);
- }
- }
- /* Scroll some text. Demonstrates the Print() & Pos() functions. */
- void ScrollText(const char *Text)
- {
- int Length = strlen(Text); // Calculate length of string in pixels.
- HCDisplay.Clear();
- // Scroll the text across the display.
- for(int16_t x = 6; x > -Length; x--)
- {
- HCDisplay.Pos(x);
- HCDisplay.Print(Text);
- delay(200);
- }
- }
- /* Count down in 0.001 increments. Demonstrates printing floating point numbers */
- void CountDown(float Value)
- {
- while(Value >= 0)
- {
- HCDisplay.Clear();
- HCDisplay.Pos(2);
- HCDisplay.Print(Value, 3);
- delay(1);
- Value -= 0.001;
- }
- }
- /* Set the state of the battery level icon. Valid values are from 0 (empty) to 3 (full).
- * Note that each segment of the battery icon is mapped to the decimal points of the left most
- * 3 digits of the display. */
- void Battery(byte Level)
- {
- if(Level >= 0 && Level <= 3)
- {
- //Use DRAWMODE_OR mode to write the decimal point(s) so that we don't overwrite what's currently being displayed
- HCDisplay.DrawMode(DRAWMODE_OR);
- // Start from the left most digit
- HCDisplay.Pos(0);
- // Write to the left most decimal points to set the state of the battery icon
- for(; Level > 0 ; Level--)
- HCDisplay.Print(".");
- // Put the drawing mode back to normal.
- HCDisplay.DrawMode(DRAWMODE_NORMAL);
- }
- }

The HCDisplay library for the above sketch can be downloaded from the software section of this support forum here:
http://forum.hobbycomponents.com/viewto ... =58&t=2827
Dimensions
Community contributions:
Forum user Gazz292 has kindly posted a range of 3D printed cases he has designed for this display. You can find the his original post here:
viewtopic.php?p=7939#p7939
Libraries, example code, and diagrams are provided as an additional free service by Hobby Components and are not sold as part of this product. We do no provide any guarantees or warranties as to their accuracy or fitness for purpose.
Descriptions and diagrams on this page are copyright Hobby Components Ltd and may not be reproduced without permission.