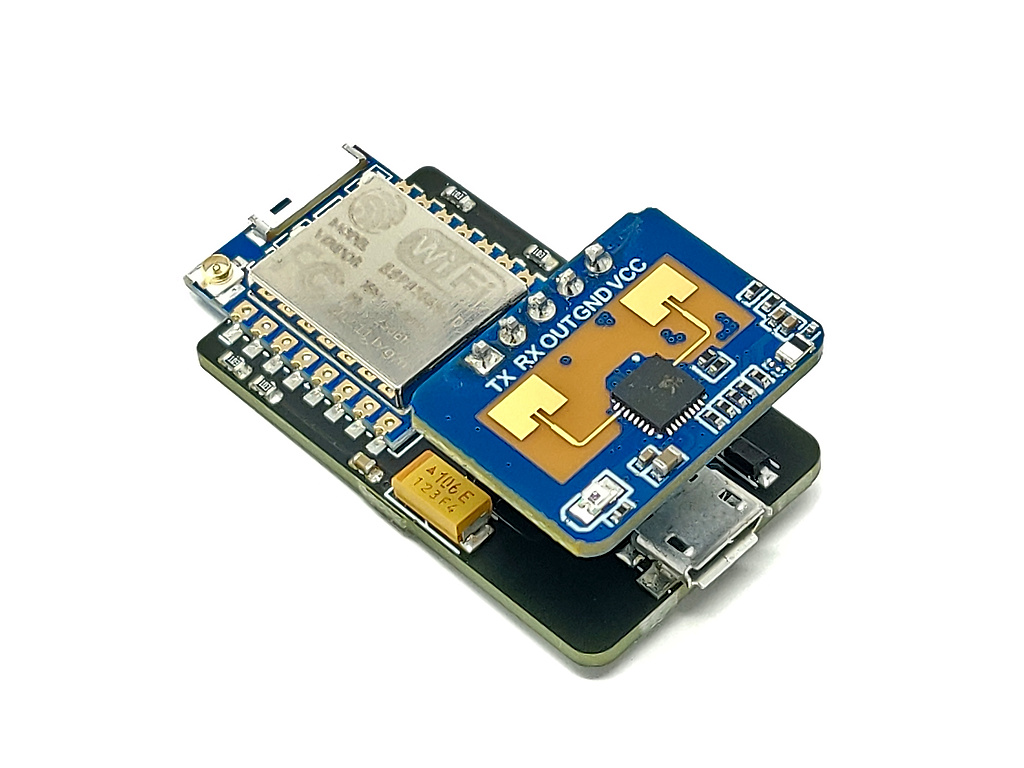

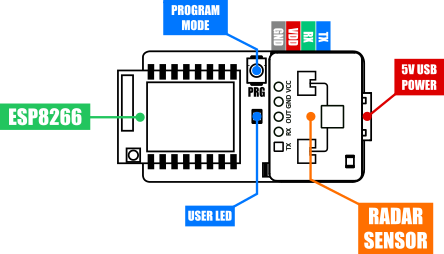
The ESP Presence detector is an ESP8266 WiFi module with a built-in human presence detector. The module combines a 2.4GHz Wifi compatible ESP8266 (ESP-07) module together with a Hi-Link LD2410C radar sensor which is capable of sensing both human presence and motion.
Home Assistant Compatible -
Although ESP presence detector is fully programmable via its serial interface (requires additional USB adaptor) it comes pre-flashed with custom ESPHome firmware. This means that out-of-the box it is compatible with the home automation system Home Assistant. Simply connect power to the module via its microUSB socket and use a mobile phone to connect it to your WiFi network via its captive portal page - no programming required.
For a step by step guide please see our blog post here: [https://blog.hobbycomponents.com/?p=1248]
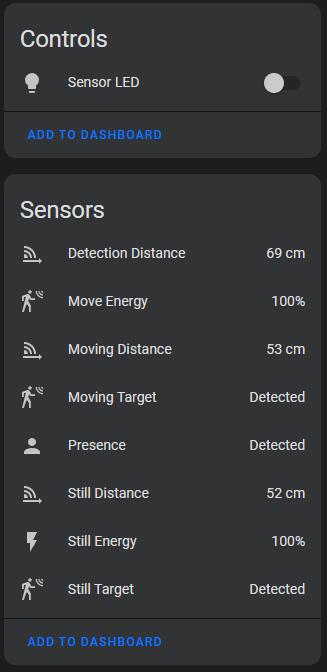
Home assistant example control panel:

Product code: 								HCMODU0241
Supply voltage:								5V
Current consumption (connected to WiFi network):	150mA
Interfaces:								5V microUSB (power), serial programming interface (5V tolerant), program mode button
ESP8266 type: 								ESP-07
ESP8266 clock: 								80MHz
ESP8266 Flash: 								8Mbit
ESP8266 Transmit power: 						802.11b: 16±2 dBm (11Mbps)
										802.11g: 14±2 dBm (54Mbps)
										802.11n: 13±2 dBm (HT20, MCS7)
Sensing type: 								Motion & human presence detection
Sensor distance: 							6 metres with 8 adjustable sensitivity zones (gates)
Sensor detection angle: 						±60 degrees
Sensor frequency: 							24GHz - 24.25GHz
Mounting options: 							Wall or ceiling
Dimensions: 								37.5mm x 22mm x 17.5mm

Programming:
PLEASE NOTE - reprogramming this device will overwrite the existing firmware
The module contains an ESP8266 (ESP-07) WiFi compatible microcontroller which is compatible with the Arduino IDE. It also includes a serial interface for programming and therefore its firmware can be replaced with your own sketches or other compatible firmware in the same way as any generic ESP development board. To reprogram the module follow these steps:
1) Connect the serial header to a compatible USB to serial (FTDI) adapter as shown:
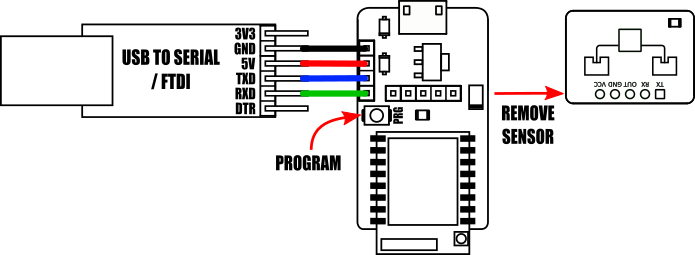
2) Remove the presence detection sensor.
3) Hold down the programming button whilst connecting the serial adapter into your computer
4) The device is now in programming mode and can be programmed via your programming software or Arduino IDE.
5) After flashing, disconnect and reconnect the power to run the new firmware.
Arduino IDE setup guide:
The module is compatible with the Arduino IDE via the board manager feature. The latest version of the Arduino IDE can be downloaded from the official Arduino website here:
https://www.arduino.cc/en/software
Once installed you will need to add board support for ESP8266 devices. To do this just follow steps 1 & 2 in our blog post here:
https://blog.hobbycomponents.com/?p=937
Arduino IDE board settings:
Board: Generic ESP8266 Module
Port: The COM port of your USB interface module.
Crystal Frequency: 26MHz
Flash Frequency: 40MHz
Flash mode: DIO
Reset Method: dtr
Upload Speed: 115200
Flash Size: 1MB (FS64KB OTA:~470KB)
CPU Frequency: 80MHz
You can leave any additional settings to their defaults.
Schematic:
3D Printed Case:
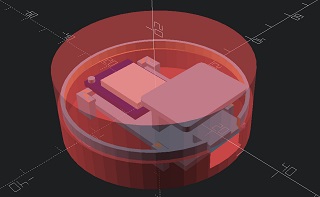
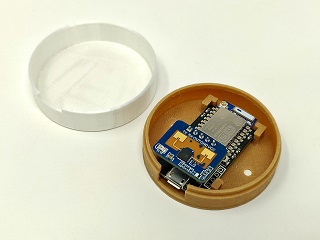
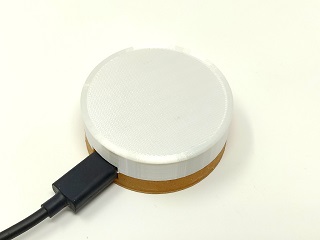
For owners of a 3D printer we have created a simple 'pill box' style case to house the module. This is a screwless design that does not require any additional fixings to construct and hold the module in place. There is a single access hole for connecting a microUSB power cable and two screw holes on the rear should you wish to mount the case to a wall using screws rather that adhesive pads.
This STL files for this case are available in Thingyverse at the link below:
https://www.thingiverse.com/thing:6574142
Please note that this case is supplied freely as an additional service to our customers. It is not sold as part of the ESP presence detector module and we do not make any promises as to its suitability or fitness for purpose.
Libraries, example code, and diagrams are provided as an additional free service by Hobby Components and are not sold as part of this product. We do not provide any guarantees or warranties as to their accuracy or fitness for purpose.