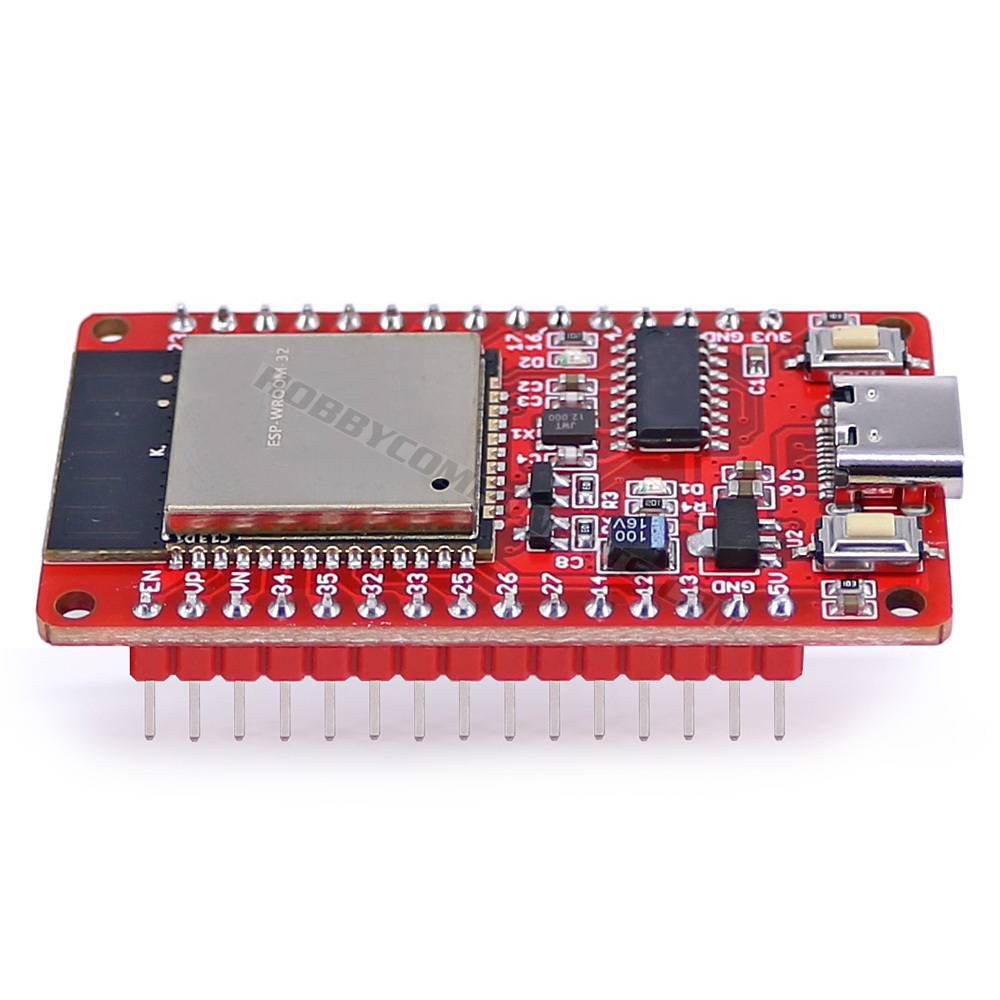

This development board is based on the popular Expressive ESP32 module. It breaks out all the modules available pins to a convenient 0.1” pitch dual in-line format suitable for breadboarding or other formats of prototyping. It also includes an auto programming circuit (reset button must be pressed after upload to run sketch) which allows the module to be automatically programmed from a computer via its USB type C socket.
It is fully compatible with the Arduino IDE via the board manager feature (see below for instructions) and so can be programmed just like any other Arduino board.
Please note that you will require a USB type C cable to program this board:
https://hobbycomponents.com/cables/1029 ... -cable-15m
What is the ESP32?
ESP32 is a single chip ARM based microcontroller which includes a 2.4 GHz Wi-Fi and Bluetooth-Compatible radio designed with ultra low power 40 nm technology. It is designed and optimised for low power performance, better RF performance, robustness, versatility, features and reliability, for a wide variety of applications, and different power profiles.
Features:
- TypeC USB: supply power and update of firmware;
- Uart to TTL chip: CH340;
- Working voltage: 2.8 - 3.6V;
- Logic level: 3.3V;
- Working current: 120mA;
- CPU Frequency: 240M Hz;
- Flash size: 4M Bytes (32M bits);
- SRAM: 520k Bytes;
- Wireless Frequency: 2400M-2483.5M Hz;
- Antenna Type: Built-in PCB antenna is available.
- Wireless Network Mode: station / softAP / SoftAP + station.
- Wireless criteria: 802.11 b/g/n/e/i; Bluetooth-Compatible 4.2 (BR/EDR/BLE);
- Digital interface: UART/SPI/I2C/GPIO/PWM/ Analog INPUT / Analog OUTPUT;
Drivers:
This development board includes a CH340 USB to UART IC to allow it to be programmed directly from the USB port of a computer.
The USB driver can be downloaded from the manufacturers website here:
http://www.wch-ic.com/downloads/CH341SER_EXE.html
Schematic:
https://hobbycomponents.com/images/foru ... ematic.pdf
Adding board support to the Arduino IDE:
Latest versions of the Arduino IDE allow for adding additional 3rd party board support directly from within the Arduino IDE. To add support for the this board simply open up your Arduino IDE and follow these steps:
1) Go to File->Preferences
2) In the window that opens up find the text box labelled 'Additional Boards Manager URLs:' and paste the following line into it...
https://raw.githubusercontent.com/espre ... index.json
...then click the OK button to close the window.
3) Next go to Tools->Board->Boards Manager
4) In the window that opens up, look for the entry titled 'esp32' (hint: you can type esp32 into the filter box at the top of the window to find it) and click on it.
5) In the bottom right-hand corner of this entry you should now see an install button appear. Click on this and board manager will then automatically add all the files necessary to support the ESP32. This may take a few minutes depending on the speed of your internet connection.
6) Now under Tools->Board->ESP32 Arduino you will see a set of new additional esp32 based board types including one labelled 'ESP32 Dev Module'.
7) Select it as the board type and now under the Tools menu you should see new options for this board. Leave them as the default but set the COM port to match the one for your board just like you would with any other Arduino.

You should now be able to flash a sketch to the board in the normal way.
Notes:
To run a sketch after it has been uploaded you must reset the board by pressing the on-board reset button marked RST.
If testing with the ‘blink’ sketch please note that this board does not have a built in LED
Libraries, example code, and diagrams are provided as an additional free service by Hobby Components and are not sold as part of this product. We do no provide any guarantees or warranties as to their accuracy or fitness for purpose.
Descriptions and diagrams on this page are copyright Hobby Components Ltd and may not be reproduced without permission.