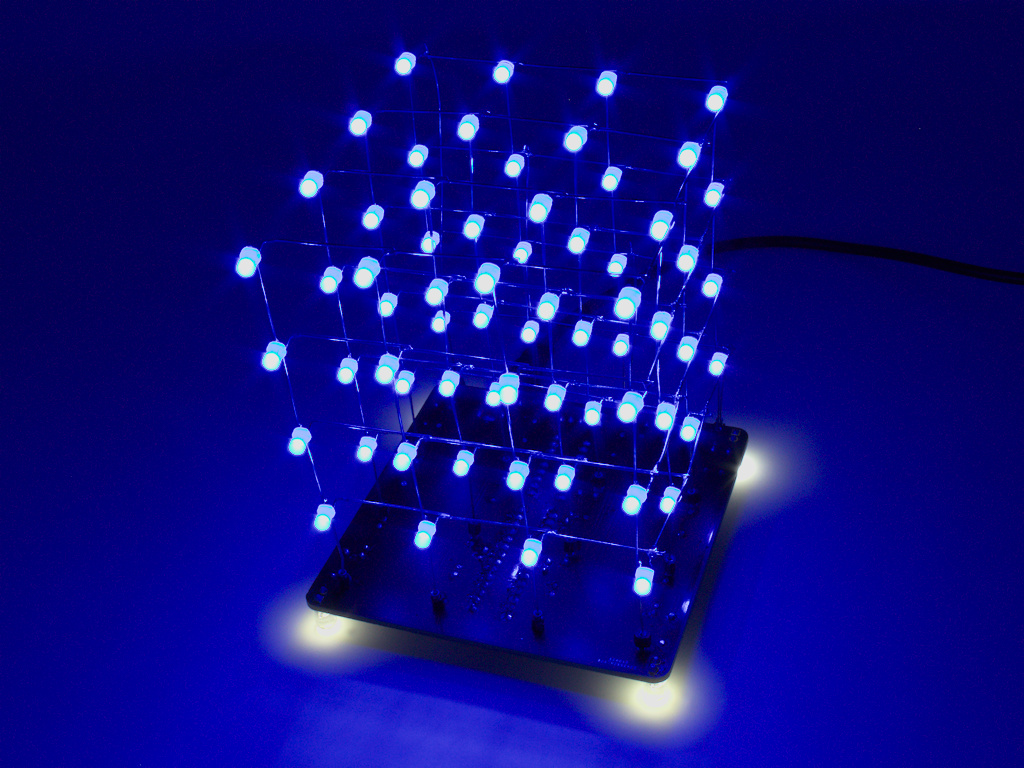
4x4x4 Version 2 LED Cube kit Build Guide

Post Reply
admin
Site Admin
Posts: 879
Joined: Sun Aug 05, 2012 4:02 pm

4x4x4 Version 2 LED Cube kit Build Guide

Post by admin » Mon Nov 29, 2021 11:30 am

Image


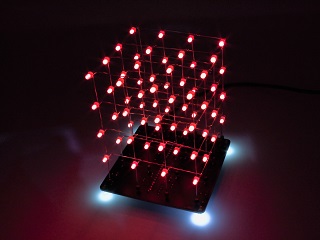
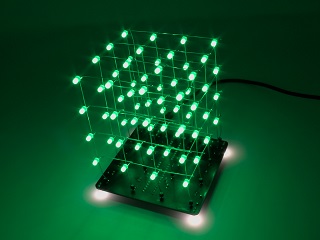
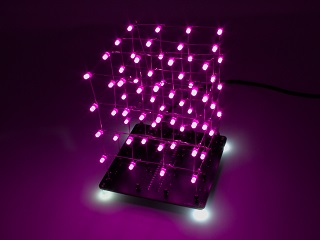
LED light cubes are a hugely popular and fun project and with this kit you will have all the parts to build your very own 64 LED cube. The kit has been specifically designed to be easy to build and includes only through-hole components so that even someone with basic soldering skills, a soldering iron and a few simple tools can build it. It comes pre-flashed with 13 animations so is ready to go as soon as its all been soldered together

For Arduino users this kit is also Arduino compatible and together with our free Arduino library you can write and upload your own cube animations (requires the Arduino IDE and a USB to serial adapter to upload sketches).


This is version 2 of the kit that includes the following changes:

* Much bigger measuring 83x83x110mm when fully built
* DC socket with USB to DC Jack cable replaces serial cable for powering directly from a 5V USB adapter
* ICs are now socketed
* Bigger PCB with more spacing between components to easier construction
* Optional LED template PCB to make constructing the LED cube easier
* Now available with cube LEDs in blue, red, white, green, and pink
* Base LEDs are now controllable


The kit is available with 5 different LED colour versions:

64 x 3mm BLUE LEDs (HCKITS0070)
64 x 3mm WHITE LEDs (HCKITS0071)
64 x 3mm RED LEDs (HCKITS0072)
64 x 3mm GREEN LEDs (HCKITS0073)
64 x 3mm PINK LEDs (HCKITS074)
ImageImageImageImageImage


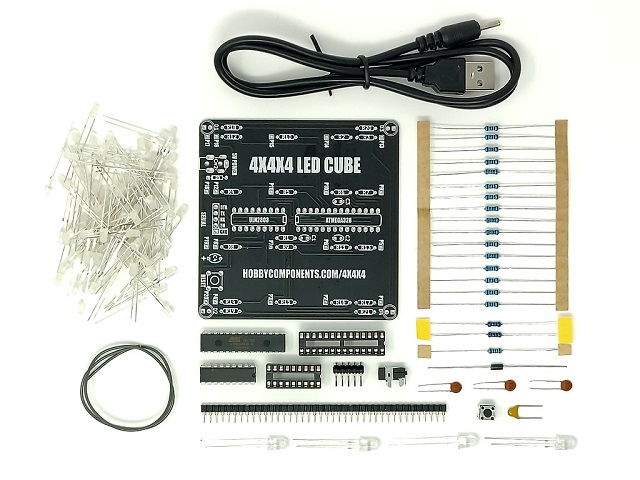
What you get in the kit:

Image

QTY 		Description
1x		Version 2 4x4x4 Cube Kit PCB
16x 		180 Ohm resistors (BRN, GRY,  BLK, BLK, BRN)
2x 		220 Ohm resistors (RED, RED, BLK, BLK, BRN)
1x 		10K Ohm resistor (BRN, BLK, BLK, RED, BRN)
3x 		100nF ceramic capacitor (marked 104)
1x 		470nF ceramic capacitor (marked 474)
1x 		SR1100 Diode
1x 		28 pin IC socket
1x 		18 pin IC socket
1x 		ULN2003 18 pin IC
1x 		ATMega328 28 pin IC
1x 		Push button
1x 		2.1mm DC socket
1x 		5 Pin right-angled header (may be supplied as a 40 pin breakable strip)
20 		(+ spares) Male to female sockets (supplied as a 40 pin breakable strip)
4x 		5mm white LEDs
64x		(+ spares) 3mm LEDs 
25cm 	Solid core wire
1x  		USB to 2.1mm DC cable


Required items (not included in the kit)

A soldering iron + solder
A small pair of snips or side cutters for trimming component leads
A 5V USB adaptor for powering the cube (500mA or greater)


Recommended items (not included in the kit)

A pair of long nose pliers for bending LED legs
Version 2 4x4x4 cube template PCB (HCPROT0101)


Image

Version 2 cube kit build guide in PDF form:

https://hobbycomponents.com/downloads/4 ... _Guide.pdf


Files for making your own cube template:

Hole template
https://hobbycomponents.com/downloads/4 ... mplate.pdf


Silk screen
https://hobbycomponents.com/downloads/4 ... e_Silk.pdf


Arduino compatible library for creating your own sketches:
viewtopic.php?f=58&t=3007


Disclaimer: Libraries, example code, and diagrams within this forum thread are provided as an additional free service by Hobby Components and are not sold as part of any product. We do not provide any guarantees or warranties as to their accuracy or fitness for purpose.

Descriptions and diagrams on this page are copyright Hobby Components Ltd and may not be reproduced without permission.

ILYBTodd
Posts: 44
Joined: Mon Nov 05, 2018 6:20 pm

Re: 4x4x4 Version 2 LED Cube kit Build Guide

Post by ILYBTodd » Wed Jan 19, 2022 1:51 am

I have built two of the V2 kits already after building 5 V1 kits and one of the 8x8x8 provided by HC and love the outcome. The upgrades to this design are much appreciated and have resulted in two perfect launches without need for any tweeking or adjustments. Nice addition to the patterns as well.

The larger format is very appealing and the incorporation of sockets for the ICs is a good upgrade.

I recommend the template to hold the LEDs during assembly. Because of the increased spacing, paying extra attention to the LED leg bending process is a must. Placing the "short" leg on top of the LED to the left and the "Long" leg beside the LED toward the base will help to get enough clearance between legs and provide enough overlap to solder effectively. I'll try to send pictures showing the technique using the extra LEDs supplied.

It is important to bend the Long leg as tight to the LED as possible without damaging it. Bend the Short leg between the thick part of the leg (whatever it's called) and the LED to insure it reaches the LED to its left in the template. I used fine point needle nose pliers.

Soldering the Long leg to the side of the mating Long leg increases the clearance between it and the Short leg from the LED to the right minimizing the chance of a short circuit. (See photo)
You do not have the required permissions to view the files attached to this post.

ILYBTodd
Posts: 44
Joined: Mon Nov 05, 2018 6:20 pm

Re: 4x4x4 Version 2 LED Cube kit Build Guide

Post by ILYBTodd » Wed Jan 17, 2024 9:27 pm

Andrew,

Thought you would appreciate what I made to complement the V2 kits I've built so far.

Todd
You do not have the required permissions to view the files attached to this post.
Last edited by ILYBTodd on Sat Jan 20, 2024 11:38 am, edited 1 time in total.

andrew
Site Admin
Posts: 1422
Joined: Sun Aug 05, 2012 4:15 pm

Re: 4x4x4 Version 2 LED Cube kit Build Guide

Post by andrew » Thu Jan 18, 2024 9:02 am

They look great and the cubes look very neat too! Did you cut the parts by hand?
Comments made by this poster do not necessarily reflect the views of Hobby Components Ltd.

ILYBTodd
Posts: 44
Joined: Mon Nov 05, 2018 6:20 pm

Re: 4x4x4 Version 2 LED Cube kit Build Guide

Post by ILYBTodd » Thu Jan 18, 2024 11:30 am

Sure did.
Had some scrap NiChrome ribbon wire and acrylic window pane sheets laying around so I made a sheet bender and scored the plastic into strips with a hand tool. Heated the bend points over the wire after connecting it to a salvaged PC power supply and as soon as they were just soft enough made the bends. Glued the shelves in place with E6000 plastic glue. I like the way they accentuate the bottom lighting and give the LED Cube even more depth due to their reflections.

My apologies for the dust on the green one. apparently I need to do some house cleaning too. :)

andrew
Site Admin
Posts: 1422
Joined: Sun Aug 05, 2012 4:15 pm

Re: 4x4x4 Version 2 LED Cube kit Build Guide

Post by andrew » Thu Jan 18, 2024 3:48 pm

My apologies for the dust on the green one. apparently I need to do some house cleaning too
Yeah, they are a bit awkward to dust, especially the 8x8x8 one.
Comments made by this poster do not necessarily reflect the views of Hobby Components Ltd.

ILYBTodd
Posts: 44
Joined: Mon Nov 05, 2018 6:20 pm

Re: 4x4x4 Version 2 LED Cube kit Build Guide

Post by ILYBTodd » Sat Jan 20, 2024 11:42 am

andrew wrote:
Thu Jan 18, 2024 3:48 pm
My apologies for the dust on the green one. apparently I need to do some house cleaning too
Yeah, they are a bit awkward to dust, especially the 8x8x8 one.
Blew the dust away with a vacuum exhaust. Couldn't stand it any more. I think I'll just have to purchase two new ones (Red and Blue) to compliment the pair :-). Thanks Andrew.

ILYBTodd
Posts: 44
Joined: Mon Nov 05, 2018 6:20 pm

Re: 4x4x4 Version 2 LED Cube kit Build Guide

Post by ILYBTodd » Sun Feb 04, 2024 10:51 pm

Ordered two more to compliment my set. Can't wait to build and display them.

andrew
Site Admin
Posts: 1422
Joined: Sun Aug 05, 2012 4:15 pm

Re: 4x4x4 Version 2 LED Cube kit Build Guide

Post by andrew » Mon Feb 05, 2024 9:05 am

Ordered two more to compliment my set.
Yep, I see the order thanks. It will be dispatched later this morning (UK time).
Comments made by this poster do not necessarily reflect the views of Hobby Components Ltd.

Post Reply

Return to “4x4x4 Version 2 Cube Kits”