
The mLink relay modules are a range of 5V relay modules that have been designed to be controlled either manually or via a microcontroller. For manual control there is a set of digital pin(s) that can be toggled to directly control the relay. For controlling via a microcontroller there is a serial I2C interface minimising the amount of pins required to control multiple relays or relay modules.
For Arduino users you can use the mLink library (see below) to control any type of mLink module. Only one single instance of the library is needed to control multiple types of mLink modules resulting in very little resources overhead and therefore making it great for Arduinos with small amounts of memory and pin counts.
For Raspberry Pi users we have a Python module which can be installed via pip or downloaded and installed directly from our forum. Please see the mLink Python forum thread for requirements and download link here: viewtopic.php?f=131&t=3062&p=8592#p8592

Module specifications:
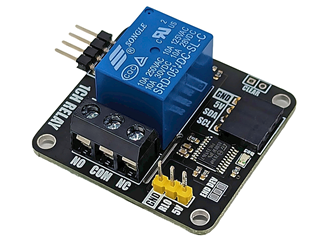
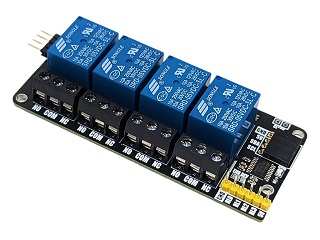
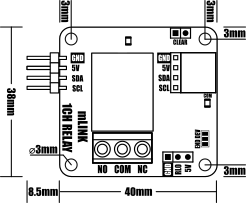
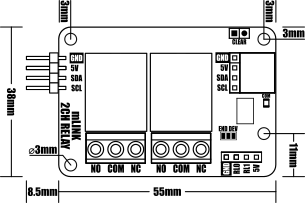
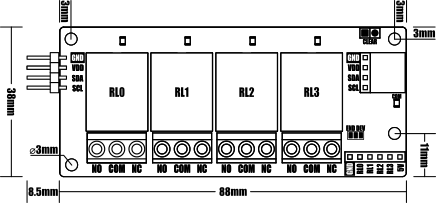
Module code: 							HCMODU0182 (1ch relay module)
									HCMODU0183 (2ch relay module)
									HCMODU0184 (4ch relay module)
Supply Voltage (VDD): 					4.5V to 5.5V
Current consumption (relay(s) off):			5.5mA
Current consumption (relay(s) on):			70mA (1ch), 125mA (2ch),  235mA (4ch)
Interfaces:							I2C, relay digital input(s), NO-COM-NC relay screw terminals.
I2C Interface speed: 						400kbits/s (fast mode)
I2C default address (HEX): 				0h52
Relay input (RL0 to RL3) low level voltage: 	0V to 1.5V
Relay input (RL0 to RL3) high level voltage: 	3.5V to 5V
Relay contact rating (resistive load): 			5A max at 28VDC or 240VAC
Maximum number of modules: 				5 with pullups fitted, 112 with pullups removed*
Module dimensions (inc headers):			48.5mm x 38mm x 19.2mm (1ch relay module)
									63.5mm x 38mm x 19.2mm (2ch relay module)
									96.5mm x 38mm x 19.2mm (4ch relay module)
*Note the maximum number of connected modules will depend on cable lengths and power requirements of each module. Do not exceed 5 mLink modules connected in series with all fitted to all modules.
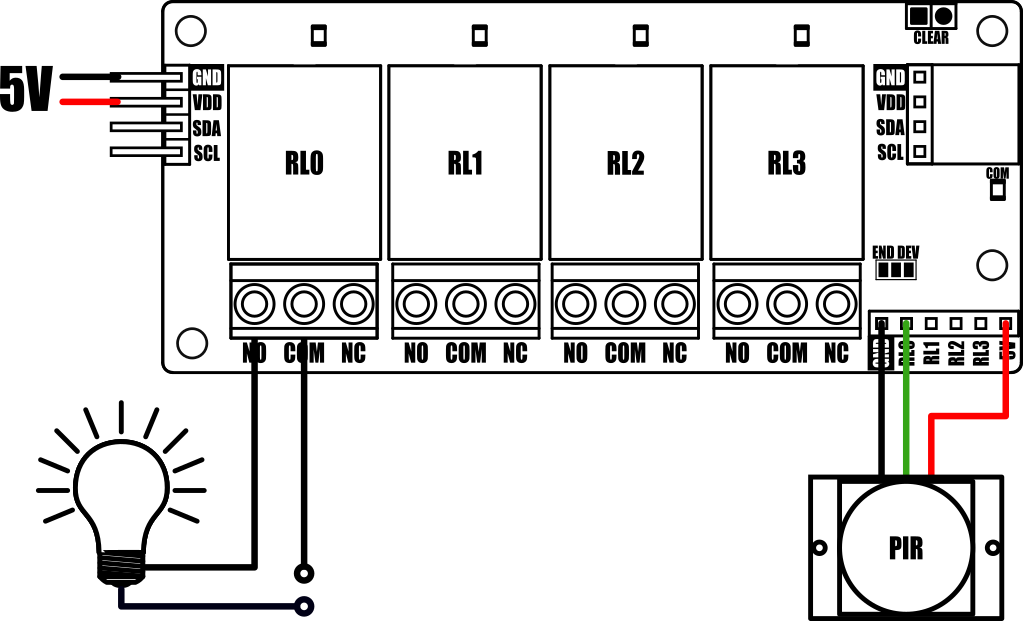
Standalone Control Example:
The mLink relay modules can be used standalone just like most other types of relay module. They provide a set of digital input pins (RL0 to RL3) to control each relay independently. Pulling a pin high (connecting it to 3.5V to 5V) will turn the relay on, pulling it low (0V/GND), or leaving it disconnected will turn the relay off.
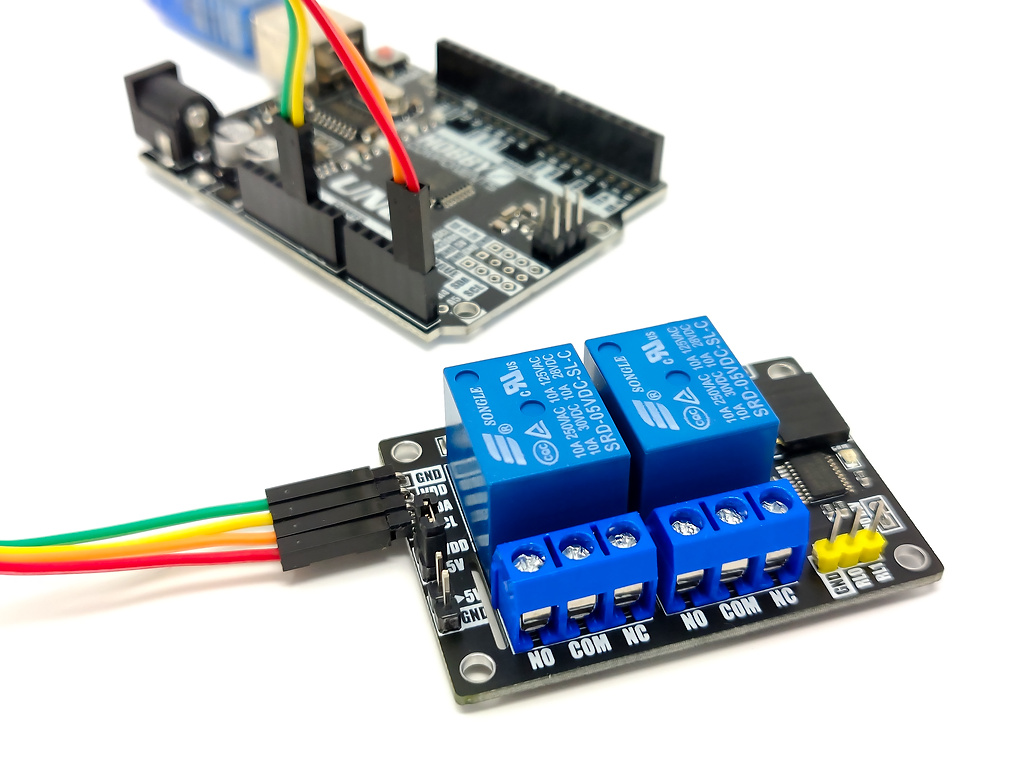
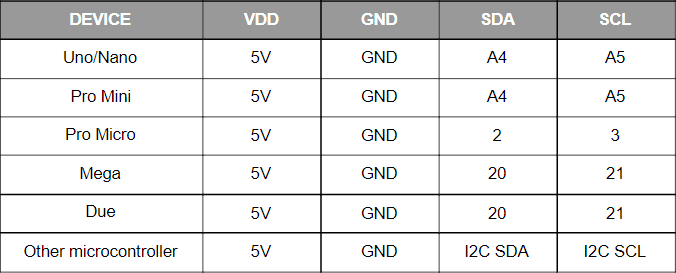
Arduino Connection Example:
When used with microcontollers such as Arduino the mLink relay modules can be controlled via a serial I2C interface.
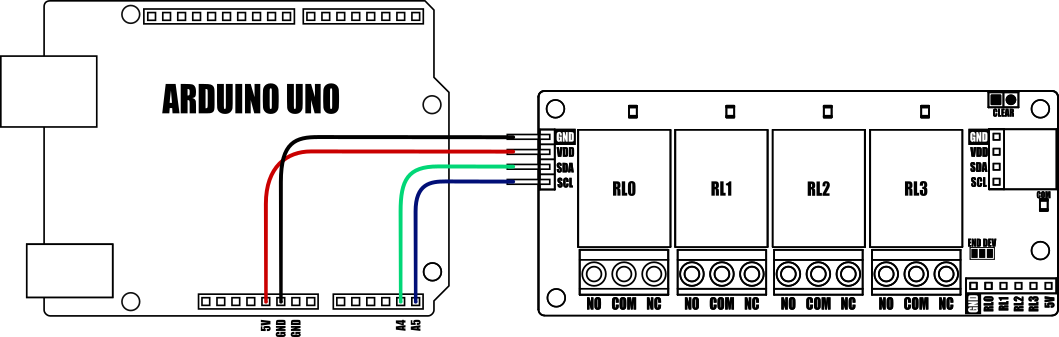
Because the modules use an I2C interface this also means multiple modules can controlled from a single Arduinos I2C interface simply by daisy-chaining them together. Note to control multiple mLink modules of the same type requires changing the default I2C address of the additional modules. See mLink Library Quick Start Guide for how to do this.

Raspberry Pi Connection Diagram
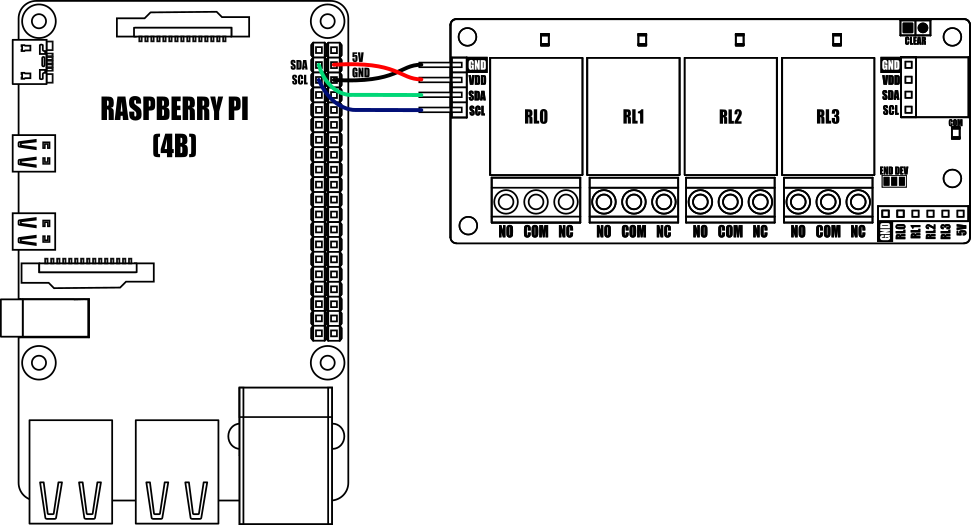
Please note: when connecting to a Raspberry Pi the mLink modules I2C pullup resistors should be removed. See the 'Removing the modules I2C pullup resistors' section below for more information.
Removing the modules I2C pullup resistors
Please note that the modules I2C pullup resistors should be removed if you intend to use it as follows:
1) You wish to connect more than 5 modules to the same I2C bus.
2) You have a 3.3V development board that does not have a 5V tolerant I2C interface.
3) You have a 3.3V development board that has its own I2C pullup resistors which are connected to its 3.3V supply.
To disconnect the modules two 10K pullup resistors from the I2C bus, locate the 3 jumper pads labelled ‘END DEV’ and cut the two tracks linking them together as follows:

Dimensions:

mLink Arduino library
viewtopic.php?f=58&t=3001
mLink Raspberry Pi Python module
The mLink python module can be installed with the following terminal command:
- pip install hc-mlink
Alternatively the library can be manually installed by downloading it from the forum and unzipping it to your project folder. See the Python module forum thread for more information and download link:
viewtopic.php?f=131&t=3062&p=8592#p8592
Please note that in some cases there may be additional configuration required. If you have issues getting your Raspberry Pi to communicate with the mLink module then please see the Python module forum thread here: viewtopic.php?f=131&t=3062
mLink Library Quick Start Guide For Arduino Users
https://hobbycomponents.com/downloads/m ... e_V1_1.pdf
mLink Library Reference Guide For The Relay Modules
https://hobbycomponents.com/downloads/m ... V1_1_1.pdf
mLink Specifications and Register Map For The Relay Modules
https://hobbycomponents.com/downloads/m ... p_V1_1.pdf
Customer contributions:
Tony Bond has kindly modelled the 2 channel version of the mLink relay in 3D. You can download it as a step file here:
https://hobbycomponents.com/downloads/m ... U0183.step
ebme2 has added support for the mLink relay and RGBW modules to ESPHome via its external component feature. You can find a link to the github page here:
https://github.com/EBME2/esphome
Original post: viewtopic.php?p=8976#p8976
Libraries, example code, and diagrams are provided as an additional free service by Hobby Components and are not sold as part of this product. We do no provide any guarantees or warranties as to their accuracy or fitness for purpose.
Descriptions and diagrams on this page are copyright Hobby Components Ltd and may not be reproduced without permission.