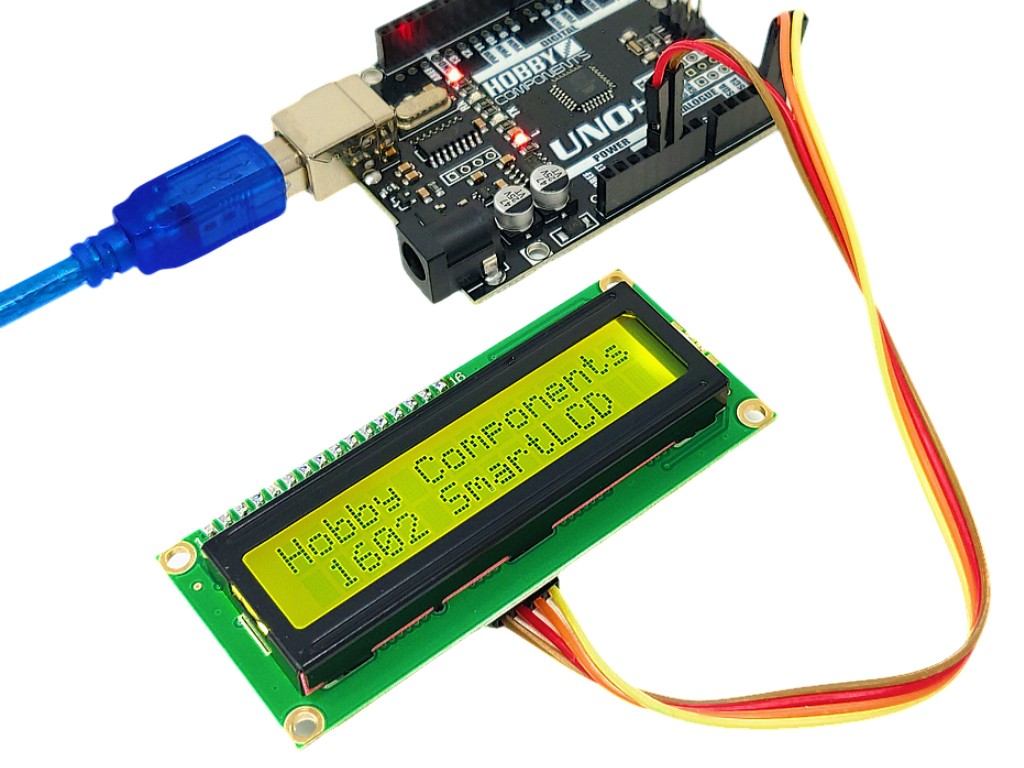

The 1602 SmartLCD module is a serially controlled 2 line by 16 character alphanumeric LCD display. Unlike most serial LCD modules on the market the 1602 SmartLCD includes a microcontroller which gives the module a rich set of features. It also requires no software or libraries to initialise the display, output text to the screen or control the features of the module, which reduces development time and frees up much needed resources in your microcontroller or development board.
This SmartLCD model features a 16x2 display with black text on a yellow, backlit transflective LCD. The transflective backlighting ensures clear visibility both indoors and in bright daylight. In well-lit settings, the backlight is not required and so can be turned off via software to conserve power.
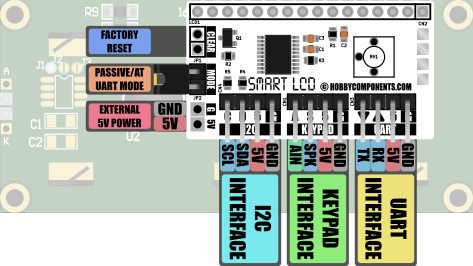
The SmartLCD can be used in one of 3 modes:
PASSIVE SERIAL (TERMINAL) MODE
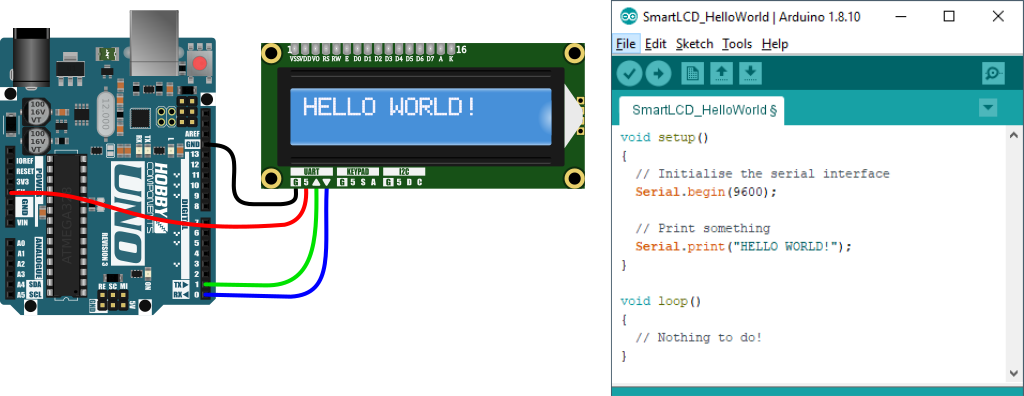
With passive serial mode no libraries or special configurations are required, just hook it up to your microcontroller's serial port and display any text output from the port. That's it!
SERIAL AT COMMAND MODE
Serial AT command mode also allows you to display text via a serial port but adds more control via simple to use text based AT commands - print text anywhere on the screen, control the brightness and contrast or even read the status of the push buttons on the optional SmartLCD keypad.
I2C MODE
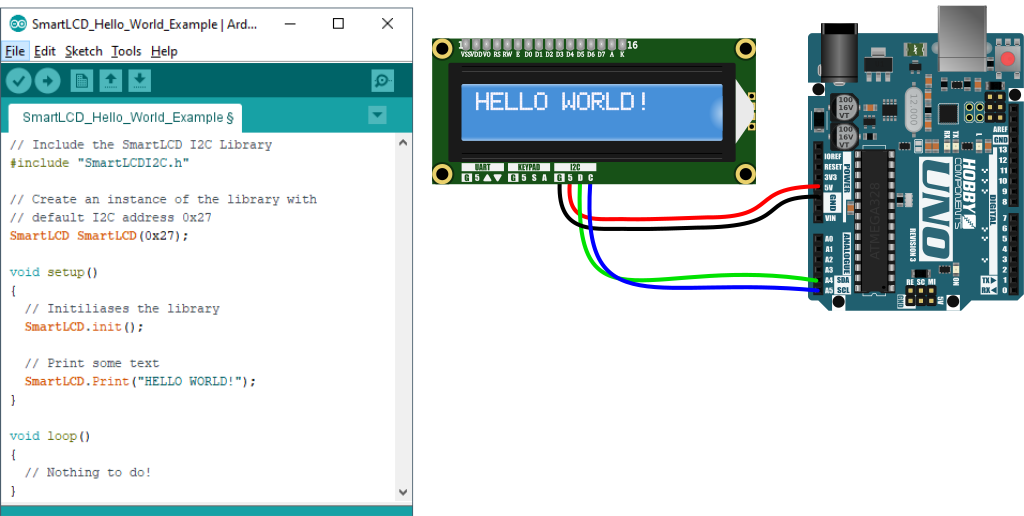
Finally in I2C mode multiple screens can be connected to one I2C port. For Arduino users just install the SmartLCDI2C library (download from our support forum) and control all the features of the SmartLCD from simple I2C commands.
Features:
16 character by 2 line LCD display module.
Very clear black text with yellow backlight.
Transflective screen - clear visibility in outdoor/brightly lit environments
No software or drivers required to setup or control the module.
Software backlight control with 11 brightness levels.
Software contrast control.
External keypad with buzzer support (optional extra, see item HCKITS0058).
Single 5V operation.
I2C Mode
Control multiple displays from one I2C bus.
Software control of all module features via simple I2C commands.
I2C address configurable via software from 0x08 to 0x77 (default 0x27).
Built-in 10K pull-up resistors for clock SCL and data SDA lines.
Access to external keypad and buzzer.
Serial AT command mode
Software control of all module features via simple AT text commands.
Software configurable baud with 8 different speeds (9600 BAUD default).
Access to external keypad and buzzer.
Serial passive mode
Compatible with 5V serial UART devices (9600 baud default) – no microcontroller required.
Automatically displays any printable ASCII text.
Responds to a number of additional extended ASCII control codes.
Specification:
Model number: HCMODU0122
Supply voltage: 5V
Display type: 16 character x 2 line alphanumeric LCD
Display technology: STN negative blue / transmissive polariser
Supply current: 27.5mA (backlight on) / 9.8mA (backlight off)
Interfaces: I2C, serial UART and external keypad
Module dimensions: 80mm x 36mm x 17.5mm
Bezel dimensions: 71mm x 24mm
Arduino Example - Printing to the screen in AT command mode
This example demonstrates how simple it is to control the LCD in AT command mode using an Arduino. The example uses the Arduinos built in serial print function to send the AT commands to clear the screen and print 'HELLO WORLD!' to the screen. No special libraries or setting up required! Just connect the LCD to your 5V Arduino as follows:
ARDUINO.......SMART LCD
GND..............GND
5V.................5
TX.................Rx
- void setup()
- {
- Serial.begin(9600); //Initialise the serial UART
- Serial.println("AT+CLR"); //Clear the screen
- }
- void loop()
- {
- Serial.print("AT+PR="); //Send the AT print command
- Serial.println("HELLO WORLD !"); //Send the text to print. Note the println to send a CR+LF after the text
- while(1); //Do nothing
- }
Optional Features - LCD Keypad kit
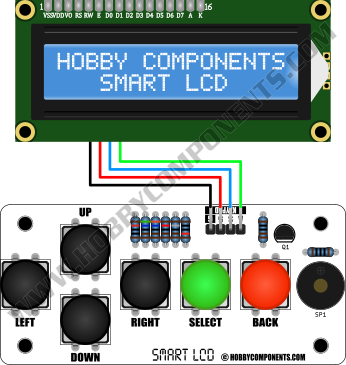
The SmartLCD's features can be further expanded with the addition of the Smart LCD keypad (see item SKU: HCKITS0058). This add-on board connects to the SmartLCD's keypad header using a single 4 way cable. Once connected it adds the additional features of keypad control (up, down, left, right, select, and back) and audible output to your end application. Access to button states and speaker output is then available via the SmartLCD's I2C or UART interfaces using its built-in commands (see the software section of the SmartLCD manual for more information).
Wireless access
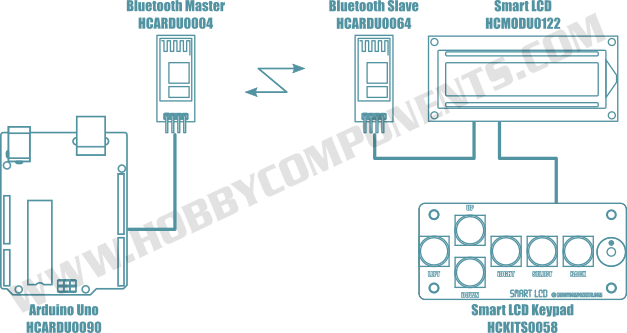
A bonus feature of the Smart LCD, due to it not requiring initialisation by a microcontroller, is it's ability to operate wirelessly using a suitable serial wireless pass-through module. Here in the diagram below you can see a remote control application of the Smart LCD and
keypad with the addition of HC-05 Bluetooth slave (see item SKU: HCARDU0004) and Bluetooth master (see item SKU: HCARDU0064) modules.

The reference manual for the SmartLCD 1602 LCD can be downloaded here:
https://hobbycomponents.com/downloads/H ... Manual.pdf
If you wish to interface the SmartLCD to an Arduino via its I2C interface we have written an Arduino library that will help simplify your sketch. This can be downloaded from the software section of our forum here:
viewtopic.php?f=58&t=2206
Disclaimer: Libraries, example code, and diagrams are provided as an additional free service by Hobby Components and are not sold as part of this product. We do not provide any guarantees or warranties as to their accuracy or fitness for purpose.
Descriptions and diagrams on this page are copyright Hobby Components Ltd and may not be reproduced without permission.