
DS3231 Clock Module 3.3V / 5V High Accuracy For Raspberry Pi

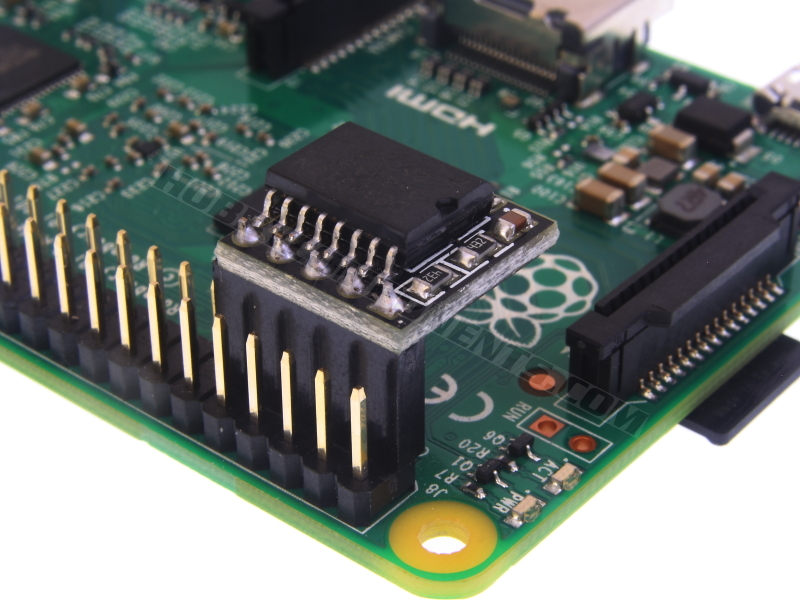
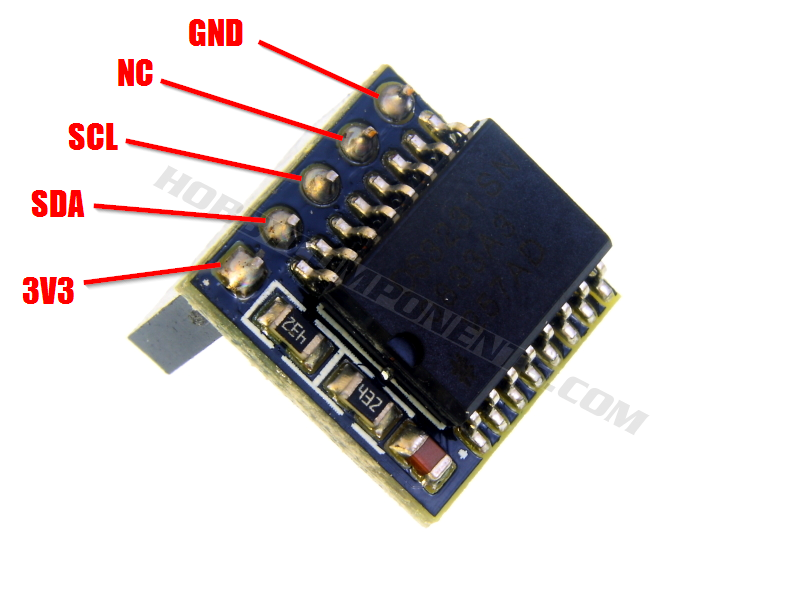
A very compact real time clock (RTC) module is based on the high accuracy DS3231 IC and includes a battery backup. The (HCRASP0009) module also has a header with a pinout specifically designed so that it can be plugged directly into the IO header of your Raspberry Pi without any need for additional wires or soldering. The module makes use of the Raspberry Pi's I2C hardware interface. Using our configuration guide available on our support forum it will allow your Raspberry Pi to accurately keep the current time and date without an internet connection making it great for remote data logging application where not internet connection is available.
Although specifically designed for the Raspberry Pi, its ability to with with both 3.3V and 5V logic levels means it can also be used with most types of microcontroller development boards such as the Arduino.
Features:
Item number: HCRASP0009
Accuracy: ± 5ppm (± 0.432 sec / day) within -40oC to +85oC temperature range.
Battery backup allowing accurate time keep without a power supply
Low power operation
DS3231 controller.
Clock functions include seconds, minutes, hours, day, date, month and year timing.
Timing valid up to year 2100
Two calendar alarm
High-speed (400kHz) I2C serial bus
+2.3 V to +5.5 V supply voltage
Raspberry Pi Setup Guide:
Please note: To follow this guide your Raspberry Pi should be connected to a monitor, mouse, and keyboard and will need a working internet connection. This guide has been tested on the Raspbery Pi version 2. Before following this guide we strongly recommend that you backup your data and/or SD card image. We cannot accept responsibility for any loss or damaged caused by not following this advice.
Firstly we need to determine that your Pi can see the RTC module. To do this we need to install the I2C utilities. In a terminal window on your Pi issue the following two commands:
Code: Select all
sudo apt-get install python-smbus
sudo apt-get install i2c-toolsNext we need to add support to the Raspian kernal for I2C devices. Issue the following command:
Code: Select all
sudo raspi-configIn the menu that opens up use your arrow keys to select the 'Advanced Options' as shown:

Hit enter and then in the next screen select 'I2C'
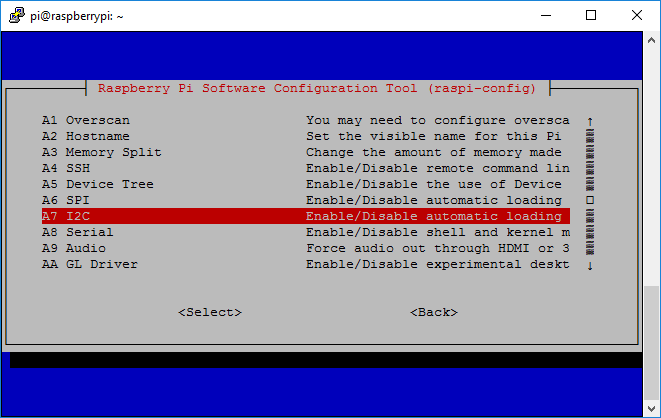
Answer yes to confirm that you wish to enable I2C support
Select OK on the next prompt and finally when asked if you would like the I2C kernel module loaded by default answer YES. Click OK one final time to confirm.
Once back in the config screen select finish to get back to the command prompt. You should be prompted if you wish to reboot. Select yes. If you're not asked to reboot then just issue the following command at the command prompt:
Code: Select all
sudo rebootWait until your Raspberry Pi has rebooted.
Once it has rebooted we can now check that everythign is working. Open up another terminal windows and issue the following command:
For old version 1 Pi's:
Code: Select all
sudo i2cdetect -y 0Code: Select all
sudo i2cdetect -y 1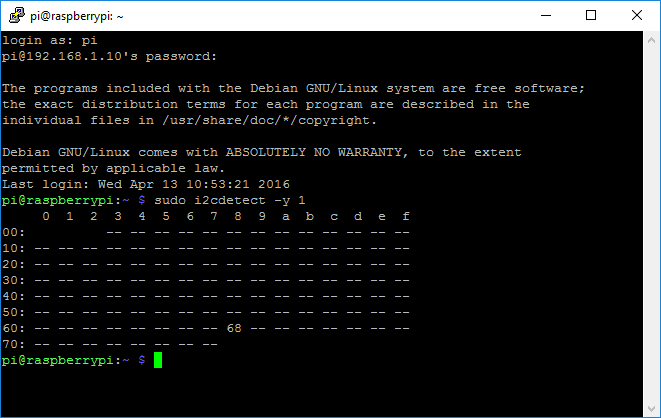
If the RTC module is installed correctly is should be reported as device 68
Configuring the module:
We first need to load the RTC module. Issue the following command:
Code: Select all
sudo modprobe rtc-ds1307Next switch to a super user with the following command:
Code: Select all
sudo bashCode: Select all
root@raspberrypi:/home/pi#If you have an older version 1 Pi issue the following command:
Code: Select all
echo ds1307 0x68 > /sys/class/i2c-adapter/i2c-0/new_deviceCode: Select all
echo ds1307 0x68 > /sys/class/i2c-adapter/i2c-1/new_deviceCode: Select all
exitReading the current time from the module:
Issue the following command:
Code: Select all
sudo hwclock -rSetting the correct time and date:
Make sure your Pi is connected to the internet and issue the following command:
Code: Select all
dateYou can simply write this correct time and date to the RTC module with the following command:
Code: Select all
sudo hwclock -wCode: Select all
sudo hwclock -rConfiguring your Raspberry Pi to read the RTC module at reboot.
You will now need to configure your Pi so that it reads the current time from the RTC module each time it reboots.
The RTC module will need to be added to the modules list so that it is loaded everytime your Pi boots. Issue the following command:
Code: Select all
sudo nano /etc/modules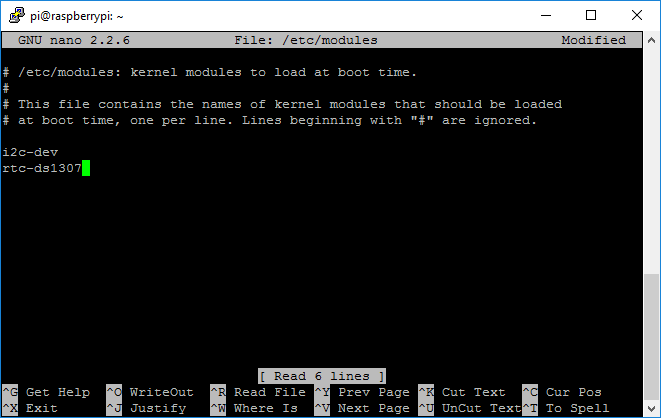
Press CTRL-X, then y, then enter to save and exit the editor.
Next we need to edit the rc.local file which will create the RTC module as a new device when your Pi is booted. Issue the following command to edit the rc.local file:
Code: Select all
sudo nano /etc/rc.localCode: Select all
echo ds1307 0x68 > /sys/class/i2c-adapter/i2c-1/new_device
sudo hwclock -s
date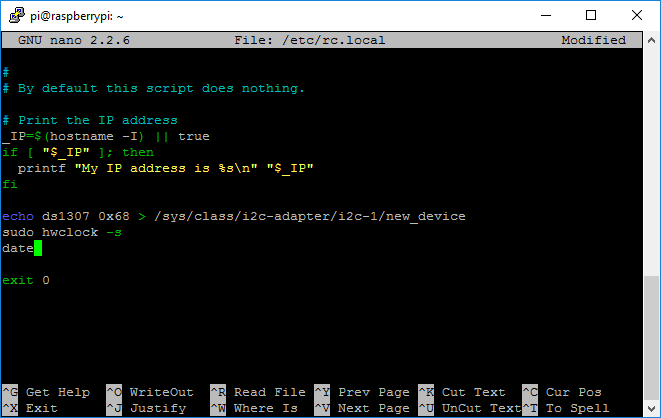
Exit the editor by pressing CTRL-X, then y, then enter.
We now need to test everything is working by powering down your Pi. Issue the following command
sudo shutdown
Wait for your Pi to shutdown and then remove the power for a few seconds.
Connect the power back to your Pi so that it reboots but this time make sure there is no internet connection.
Once rebooted, open up a terminal window and issue the following command:
Code: Select all
date