
This Arduino library provides provides print and graphics functions for various display modules and shields available for purchase from our website (hobbycomponents.com).
Currently supported Arduino compatible boards:
Uno - https://hobbycomponents.com/our-brand-e ... -usb-cable
Nano - https://hobbycomponents.com/development ... 340-usb-ic
Pro Mini - https://hobbycomponents.com/development ... -pro-mini-
Leonardo - https://hobbycomponents.com/development ... 3-leonardo
Due (HCMODU0132 & HCMODU0133 only) - https://hobbycomponents.com/development ... atible-due
Note: Other Arduino compatible boards may work with this library but are not guaranteed
Currently supported displays:
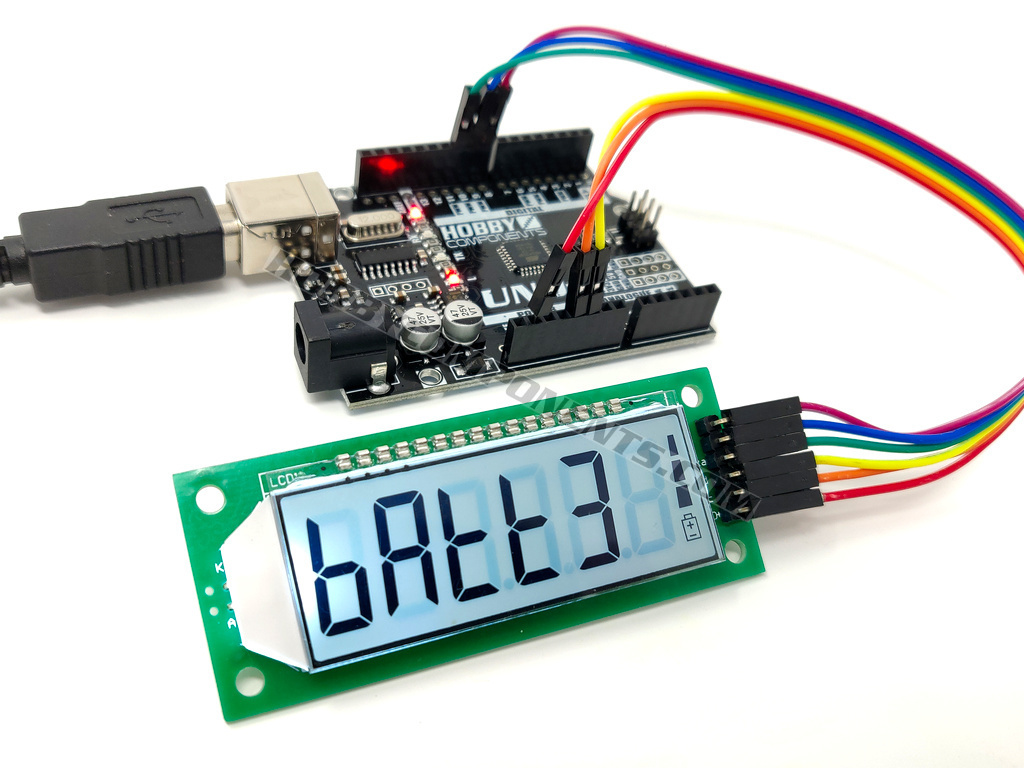
6 Digit 7 Segment LCD Module - Green Backlight (SKU: HCMODU0136)
3.2 Inch TFT shield with touch screen HX8352B (SKU: HCARDU0109)
3.2 Inch TFT shield with touch screen ILI9327 (SKU: HCARDU0111)
2.4 Inch TFT shield with touch screen (SKU: HCARDU0108)
MAX7219 Serial LED dot matrix module - Red (SKU: HCOPTO0014)
12864B Parallel/Serial Graphic LCD Module (SKU: HCMODU0032)
3.2 inch TFT LCD Module with Touch Panel ILI9341 240 x 320 (SKU: HCMODU0132)
2.4 inch TFT LCD Module with Touch Panel ILI9341 240 x 320 (SKU: HCMODU0133)
0.96" SSD1306 I2C displays (HCMODU0164)
0.96" SSD1306 SPI displays (HCMODU0150 & HCMODU0152)
1.3" SH1106 SPI displays (HCMODU0158 & HCMODU0159)
160x128 ST7735 TFT displays (HCMODU0160)
0.9" I2C IIC 128x32 SSD1306 OLED Display (HCMODU0118 & HCMODU0119)
PCD8544 based Serial LCD (Nokia 5110) 84x48 - Blue Backlight (SKU: HCMODU0105)
128x64 ST7565 based LCD displays (HCMODU0245 & HCMODU0246)
Installing the library
The library is available via several sources:
1) The latest version of the library can be found under the download section at the bottom of this post. Note that you must be logged in to download it.
2) Via our github page here: https://github.com/HobbyComponents/HCDisplay
3) For PlatformIO users you can add the library to your project by going to the library section of PlatformIO and searching either 'hobbycomponents' to view a list of our libraries or 'HCDisplay' to just list the HCDisplay library.
For Arduino IDE users the library can be installed by downloading the library as a zip file via methods 1 or 2 above then in the Arduino IDE click on the Sketch menu and navigate to Sketch->Include Library->Add .Zip Library.
In the window that opens up navigate to wherever you downloaded the .Zip file and click open. The IDE should then automatically install the library.
Alternatively you can install the library manually by unzipping it to your Arduino library folder which can normally be found in one of the following places...
On Windows:
My Documents\Arduino\libraries\
On Mac:
Documents/Arduino/libraries/
Linux:
Usually found within the users home area under /Arduino/libraries/
Using the HCDisplay library
To use the library just include the HCDisplay.h header file and then create an instance of the library. E.g:
- #include "HCDisplay.h"
- HCDisplay HCDisplay;
To initialise the library place the following line in the Setup() loop at the top of the sketch:
For HCMODU0136:
- HCDisplay.Init(CS, WR, DATA);
Where WR is the digital pin number connected to the modules WR pin.
Where DATA is the digital pin number connected to the modules Data pin.
For HCARDU0108 & HCARDU0109:
- HCDisplay.Init();
For HCOPTO0014
- HCDisplay.Init(CS, DRIVERS_X, DRIVERS_Y, Buffer);
Where DRIVERS_X is the number of modules connected in the x direction.
Where DRIVERS_Y is the number of modules connected in the y direction.
Where Buffer is the name of the byte array used to the display information.
DRIVERS_X, DRIVERS_Y, & Buffer can be defined at the top of your sketch with the following lines:
- #define CS 10 //Digital pin used for the modules chip select (CS)
- #define DRIVERS_X 1 //Number of modules daisy-chained in the X direction
- #define DRIVERS_Y 1 //Number of modules daisy-chained in the Y direction
For HCMODU0032 using the Arduinos hardware SPI interface:
- HCDisplay.Init(RS);
For HCMODU0032 using the Arduinos software SPI interface:
- HCDisplay.Init(RS, E, RW);
Where E is the digital pin number connected to the modules E pin.
Where RW is the digital pin number connected to the modules RW pin.
For HCMODU0132 & HCMODU0133:
- HCDisplay.Init(DC, CS, RST);
Where CS is the digital pin number connected to the modules CS pin.
Where RST is the digital pin number connected to the modules RST pin.
For HCMODU0164:
- HCDisplay.Init(I2C_ADD);
For HCMODU0105:
- HCDisplay.Init(DIN, CLK, RST, CE, DC, BL);
Where CLK is the digital pin number connected to the modules CLK pin.
Where RST is the digital pin number connected to the modules RST pin.
Where CE is the digital pin number connected to the modules CE pin.
Where DC is the digital pin number connected to the modules DC pin.
Where BL is the digital pin number connected to the modules backlight pin. Note, this parameter is optional.
For HCMODU0160:
- HCDisplay.Init(CS, DC, RST, BL);
Where DC is the digital pin number connected to the modules DC pin.
Where RST is the digital pin number connected to the modules RST pin.
Where CLK is the digital pin number connected to the modules CLK pin.
Where BL is the digital pin number connected to the modules backlight pin. Note, this parameter is optional.
For HCMODU0245 & HCMODU0246:
- HCDisplay.Init(DIN_PIN, CLK_PIN, CE_PIN, DC_PIN, RST_PIN); // Software SPI option (ST7565)
- HCDisplay.Init(CE_PIN, DC_PIN, RST_PIN); // Hardware SPI option (ST7565_SPI)
Where CLK_PIN is the digital pin connected to the module SCK pin (software SPI only).
Where CE_PIN is the digital pin connected to the module CE pin.
Where DC_PIN is the digital pin connected to the module DC pin.
Where RST_PIN is the digital pin connected to the module RST pin.
HCDisplay library text and graphic functions:
- void HCDisplay.Reset(void);
- void HCDisplay.Sleep(mode);
mode is the required state. Valid values are
true (screen will enter sleep state)
false (screen will wake from sleep state)
Note - not supported on some displays.
- void HCDisplay.Screen(mode);
mode is the required state. Valid values are
ON (screen on)
OFF (screen off)
Note - not supported on some displays.
- void HCDisplay.Backlight(mode);
mode is required state. Valid values for mode are
ON (backlight on)
OFF (backlight off)
Note - not supported on some displays.
- void HCDisplay.Backlight(mode);
mode is required state. Valid values for mode are
ON (backlight on)
OFF (backlight off)
Note - not supported on some displays.
- void HCDisplay.Contrast(level);
level is the required contrast level. Valid vales are:
0 (min) to 255 (max).
Note - this function is only applicable to some displays.
- void HCDisplay.SetFG(r, g, b);
r is the intensity for the red components. Valid values are 0 to 255 (note for screens supporting less colours this value will be automatically scaled down).
g is the intensity for the green components. Valid values are 0 to 255 (note for screens supporting less colours this value will be automatically scaled down).
b is the intensity for the blue components. Valid values are 0 to 255 (note for screens supporting less colours this value will be automatically scaled down).
Note - This function is intended for colour displays. For 2 colour displays use the next function instead.
- void HCDisplay.SetFG(colour);
colour is the required forground colour. Valid values for colour are:
1 (graphic and print functions are drawn in the foreground colour)
0 (graphic and print functions are drawn in the background colour)
Note - This function is intended for 2 colour (BW) displays.
- void HCDisplay.SetBG(r, g, b);
r is the intensity for the red components. Valid values are 0 to 255 (note for screens supporting less colours this value will be automatically scaled down).
g is the intensity for the green components. Valid values are 0 to 255 (note for screens supporting less colours this value will be automatically scaled down).
b is the intensity for the blue components. Valid values are 0 to 255 (note for screens supporting less colours this value will be automatically scaled down).
Note - This function is intended for colour displays. For 2 colour displays use the next function instead.
- void HCDisplay.SetBG(colour);
colour is the required background colour. Valid values for colour are:
1 (background of graphic and print functions are drawn in the foreground colour)
0 (background of graphic and print functions are drawn in the background colour)
Note - This function is intended for 2 colour (BW) displays.
- void HCDisplay.AutoRefresh(Mode);
ON (auto refresh is on - default)
OFF (auto refresh is off)
Note - OFF option is not supported on some displays.
- void HCDisplay.Refresh();
- void HCDisplay.Clear();
- void HCDisplay.Erase(x1, y1, x2, y2);
x1 is the x coordinate of the top left corner of the area to be erased.
y1 is the y coordinate of the top left corner of the area to be erased.
x2 is the x coordinate of the bottom right corner of the area to be erased.
y2 is the y coordinate of the bottom right corner of the area to be erased.
- void HCDisplay.Plot(x, y);
Sets a single pixel to the current foreground colour where:
x is the x axis coordinate of the pixel.
y is the y axis coordinate of the pixel.
Note - this library function is not supported on non-graphic displays.
- void HCDisplay.Line(x1, y1, x2, y2);
Draw a line using foreground colour where:
x1 is the starting X axis coordinate of the line
y1 is the starting Y axis coordinate of the line
x2 is the ending X axis coordinate of the line
y2 is the ending Y axis coordinate of the line
Note - this library function is not supported on non-graphic displays.
- void HCDisplay.Rect(x1, y1, x2, y2, mode, width);
Draws a rectangle using the current foreground colour where:
x1 is the x coordinate of the top left corner of the rectangle.
y1 is the y coordinate of the top left corner of the rectangle.
x2 is the x coordinate of the bottom right corner of the rectangle.
y2 is the y coordinate of the bottom right corner of the rectangle.
mode is the drawing mode. Valid values for mode are
FILLED (draw as a solid rectangle)
OUTLINE (draw as an outlined rectangle)
width is an optional parameter (default width = 1) that sets the width in pixels when drawing in outlined mode.
Note - this library function is not supported on non-graphic displays.
- void HCDisplay.Circle(x1, y1, r, mode, width);
Draws a circle using the current foreground colour where:
x1 is the x coordinate of the center of the circle.
y1 is the y coordinate of the center of the circle.
r is the radius in pixels.
mode is the drawing mode. Valid values for mode are
FILLED (draw as a solid rectangle)
OUTLINE (draw as an outlined rectangle)
width is an optional parameter (default width = 1) that sets the width in pixels when drawing in outlined mode.
Note - this library function is not supported on non-graphic displays.
- void HCDisplay.DrawMode(Mode);
Sets the drawing mode used by the text and graphic functions where:
Mode is the required drawing mode. Valid values for Mode are:
DRAWMODE_NORMAL Pixels are drawn normally
DRAWMODE_XOR Pixels are logically XOR'd with existing pixels on the display
DRAWMODE_OR Pixels are logically OR'd with existing pixels on the display
DRAWMODE_AND_INV Pixels are logically AND'd and inverted with existing pixels on the display
Note - only a subset of the above modes may work on some displays.
- void HCDisplay.Pos(x, y);
x is the x axis coordinate.
y is the y axis coordinate.
Note - for non-graphic displays that don't support y axis position the y parameter may be omitted.
- void HCDisplay.ScaleXY(ScaleX, ScaleY);
ScaleX is the magnitude of scaling in the x axis.
ScaleY is the magnitude of scaling in the y axis.
A value of 1 for ScaleX or ScaleY will result in no scaling.
A value of 2 for ScaleX or ScaleY will result the bitmap or font being scaled by a factor of 2 in the appropriate axis.
A value of n for ScaleX or ScaleY will result the bitmap or font being scaled by a factor of n in the appropriate axis.
Note - this library function is not supported on non-graphic displays.
- void HCDisplay.BWBitmap(Cols, ByteRows, BitmapData[], Background);
Cols is the number of columns in the x direction. I.e the x resolution of the bitmap.
ByteRows is the number of rows in 8 pixel chunks. I.e. the y resolution of the bitmap divided by 8.
BitmapData is an array containing the bitmap data (see below)
Background selects if the character will be printed with a solid or transparent background. Valid values for Background are
true (character is printed with background with a colour set by the SetBG() function.
false (Character is printed without a background).
Bitmap data is stored in the array as 8 bit (byte) values representing one BW 8 pixel column. These 8 bit columns are then stored in the array in the following order:
const uint8_t BitmapData[Row_0_Col_0, Row_0_Col_1,.......Row_0_Col_n,
Row_1_Col_0, Row_1_Col_1,.......Row_1_Col_n,
Row_n_Col_0, Row_n_Col_1,.......Row_n_Col_n,];
Note - this library function is not supported on non-graphic displays.
- void HCDisplay.SetFont(Font);
Font is the name of the font. Valid values for font are:
   SystemFont 				An 8pt fixed width font (default)
   Tiny_6ptFont				A tiny 6 point font
   MedProp_12ptFont			A 12pt proportional font
   LargeProp_26ptFont		A 26pt proportional font
   LCDLarge_24ptFont		A 24pt LCD style font
   LCDLarge_52ptFont		A 52pt LCD style font
   NarrowProp24ptFont		A 24pt narrow proportional font
Note - Non-graphic displays only support the default SystemFont.
- void HCDisplay.WriteChar(character);
character is the ASCII character to print
Note - To conserve memory only commonly used ASCII characters ranging from ' ' (ASCII code 0x20) to '~' (ASCII code 0x7E) are printable.
- void HCDisplay.Print(TextString, Background);
TextString is a string containing the text to be printed.
Background is optional (default = true) and selects if the character will be printed with a solid or transparent background. Valid values for Background are
true (character is printed with background with a colour set by the SetBG() function
false (Character is printed without a background)
Note - To conserve memory only commonly used ASCII characters ranging from ' ' (ASCII code 0x20) to '~' (ASCII code 0x7E) are printable.
- void HCDisplay.Print(Value, DP, Background);
Value is the number to print.
DP is optional (default = 0) and specifies the number of decimal places to display the floating point number to.
Background is optional (default = true) and selects if the number will be printed with a solid or transparent background. Valid values for Background are
true (character is printed with background with a colour set by the SetBG() function
false (Character is printed without a background)
- void HCDisplay.ReadPixelRGB(x, y, Data);
x is the x axis coordinate of the pixel
y is the y axis coordinate of the pixel
Data is a 3 byte array used to store the RGB values
Note - This function is intended for colour displays. For 2 colour displays use the next function instead.
- boolean HCDisplay.ReadPixel(x, y);
x is the x axis coordinate of the pixel
y is the y axis coordinate of the pixel
Returns a boolean true or false:
true = pixel is set to current foreground colour.
false = pixel not is set to current foreground colour.
Note - use this function for 2 colour (black and white) screens.
- uint16_t HCDisplay.ResX();
- uint16_t HCDisplay.ResY();
HCDisplay touch screen functions:
Note: Not all displays supported by the HCDisplay library support touch screen functionality. Displays with touch screen capabilities not sold by Hobby Components may have different touch screen controllers or configurations and therefore may not work with this library.
To use the touch screen features of the HCDisplaylibrary you must first initiliase the touch screen sensor by adding the HCDisplay.TouchInit(); function to the setup() section of your sketch:
For HCARDU0108 & HCARDU0109:
- HCDisplay.TouchInit(Cal_X_Min, Cal_X_Max, Cal_Y_Min, Cal_Y_Max, Mapping);
For HCMODU0133 & HCMODU0132:
- HCDisplay.TouchInit(DIN, DOUT, CLK, CS, Cal_X_Min, Cal_X_Max, Cal_Y_Min, Cal_Y_Max, Mapping);
Where DIN is the digital pin used to connect to the controllers data in pin.
Where DOUT is the digital pin used to connect to the controllers data out pin.
Where CLK is the digital pin used to connect to the controllers clock pin.
Where CS is the digital pin used to connect to the controllers chip select pin.
Where Cal_X_Min is the raw minimum value from the touch screens x axis.
Where Cal_X_Max is the raw maximum value from the touch screens x axis.
Where Cal_Y_Min is the raw minimum value from the touch screens y axis.
Where Cal_Y_Max is the raw maximum value from the touch screens y axis.
Values for Cal_X_Min, Cal_X_Max, Cal_Y_Min, & Cal_Y_Max can be obtained by running the appropriate screen calibration sketch found in the examples folder of HCDisplay library.
Mapping is used to tell the library how the x & y axis of the touch senor has been mapped to the controller. Valid values for Mapping are:
TOUCH_0_NORMAL Normal position
TOUCH_90_NORMAL Sensor is rotated 90o
TOUCH_180_NORMAL Sensor is rotated 180o
TOUCH_270_NORMAL Sensor is rotated 270o
TOUCH_0_FLIP_X X axis is in reverse direction
TOUCH_90_FLIP_X X axis is in reverse direction - sensor is rotated 90o
TOUCH_180_FLIP_X X axis is in reverse direction - sensor is rotated 180o
TOUCH_270_FLIP_X X axis is in reverse direction - sensor is rotated 270o
If you are not sure how your sensor is mapped it is recommended to try each of the first 8 options in succession until the correct mapping is found. The sensor will be mapped correctly when the raw X axis coordinate reported from the sensor increases from left to right and the raw Y axis coordinate increases from top to bottom.
- uint16_t HCDisplay.ReadRaw(boolean Axis);
Axis is a boolean value specifying which axis to measure. Valid values for Axis are:
TOUCH_AXIS_X - Specifies the X axis
TOUCH_AXIS_Y - Specifies the Y axis
Returns an unsigned int value containing a raw sensor reading for the specified axis.
- void HCDisplay.ReadTouch();
- uint16_t HCDisplay.GetCoord(Axis);
Axis is a boolean value specifying which axis reading to return. Valid values for Axis are:
TOUCH_AXIS_X - Specifies the X axis
TOUCH_AXIS_Y - Specifies the Y axis
- uint16_t HCDisplay.GetCoord(Axis);
Returns a boolean value where:
true = screen is currently pressed.
false = screen is not currently pressed.

Latest Version:
Older versions:
Disclaimer: Libraries, example code, and diagrams within this forum thread are provided as an additional free service by Hobby Components and are not sold as part of any product. We do not provide any guarantees or warranties as to their accuracy or fitness for purpose.
Descriptions and diagrams on this page are copyright Hobby Components Ltd and may not be reproduced without permission.