
This Arduino library will allow you to display various text, graphics and bitmaps on our range of TFT screens. Although in general graphics libraries tend to be relatively large, this library has been written with the intention of being as resource friendly as possible. This includes a function for loading and displaying bitmap images directly from an SD card and a MemorySave.h header fill that allows you to easily trim the library to free up vital memory. This is especially import when using a graphics display with an Uno.
The library has been written specifically for our own TFT displays including the following:
MCU Friend 2.4" TFT shield for Arduino Uno (HCARDU0095)
MCU Friend 3.5" TFT shield for Arduino Mega (HCARDU0096)
Elec Freaks 2.4" TFT screen for Arduino Uno (HCARDU0083)
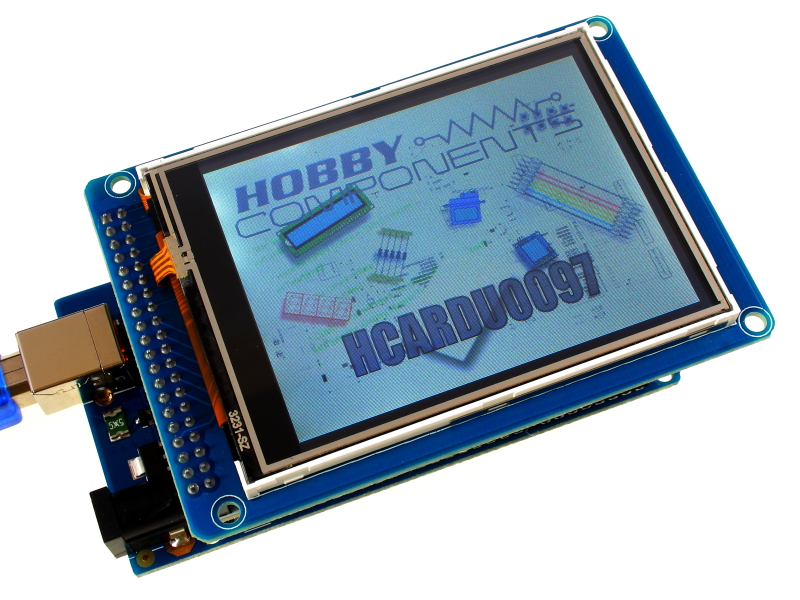
Elec Freaks 3.2" TFT screen for Arduino Mega (HCARDU0097)
You will need to download (please log in to download the library) and unzip this library to the Arduino development environments library area.
On Windows:
My Documents\Arduino\libraries\
On Mac:
Documents/Arduino/libraries/
or similarly for Linux.
Using the library
To use the library just include the HCTFT.h header file and then create an instance of the library. E.g:
Code: Select all
#include <HCTFT.h>

HCTFT HCTFT(DisplayType);DisplayType is the version of the display. Valid values are:
MCUFRIEND_2_4_UNO (HCARDU0095)
MCUFRIEND_3_5_MEGA (HCARDU0096)
ELECFREAKS_2_4_WITH_TFT01_UNO (HCARDU0083)
ELECFREAKS_3_2_WITH_TFT01_MEGA (HCARDU0097)
To initialise the library place the following line in the Setup() loop at the top of the sketch:
Code: Select all
HCTFT.Init();The following functions are available with this library:
Code: Select all
HCTFT.Reset();Code: Select all
Cursor(X, Y);X is the X axis coordinate in pixels of the top left hand corner of the text or graphic.
Y is the Y axis coordinate in pixels of the top left hand corner of the text or graphic.
Code: Select all
HCTFT.SetFG(byte R, byte G, byte B);R is the red intensity of the pixel. Valid values are between 0 and 255.
G is the green intensity of the pixel. Valid values are between 0 and 255.
B is the blue intensity of the pixel. Valid values are between 0 and 255.
Note that although the colours are specified as 24bit (8+8+8) they are scaled down to 16 bit colour (5+6+5) by the library.
Code: Select all
HCTFT.SetBG(byte R, byte G, byte B);R is the red intensity of the pixel. Valid values are between 0 and 255.
G is the green intensity of the pixel. Valid values are between 0 and 255.
B is the blue intensity of the pixel. Valid values are between 0 and 255.
Note that although the colours are specified as 24bit (8+8+8) they are scaled down to 16 bit colour (5+6+5) by the library.
Code: Select all
HCTFT.Erase(X1, Y1, X2, Y2);X1 is the X axis coordinate for the first corner.
Y1 is the Y axis coordinate for the first corner.
X2 is the X axis coordinate for the opposite corner.
Y2 is the Y axis coordinate for the opposite corner.
Code: Select all
HCTFT.Clear();Code: Select all
Plot(R, G, B);R is the red intensity of the pixel. Valid values are between 0 and 255.
G is the green intensity of the pixel. Valid values are between 0 and 255.
B is the blue intensity of the pixel. Valid values are between 0 and 255.
Note that although the colours are specified as 24bit (8+8+8) they are scaled down to 16 bit colour (5+6+5) by the library.
Code: Select all
Line(X1, Y1, X2, Y2);X1 is the start X axis coordinate of the line.
Y1 is the start Y axis coordinate of the line.
X2 is the end X axis coordinate of the line
Y3 is the end Y axis coordinate of the line.
Code: Select all
HCTFT.Rect(X1, Y1, X2, Y2, FillMode);X1 is the X axis coordinate for the first corner.
Y1 is the Y axis coordinate for the first corner.
X2 is the X axis coordinate for the opposite corner.
Y2 is the Y axis coordinate for the opposite corner.
FillMode specifies if the rectangle should be filled or not. Valid values are:
OUTLINE (draws a single pixel wide outlined rectangle)
SOLID (draws a filled rectangle)
Code: Select all
HCTFT.SetFont(Font);Font is the required font. Valid options are:
Terminal_8pt (a small fixed width 8x8 font)
MedProp_11pt (a medium proportional 2 row font)
LargeProp_25pt (a large proportional 4 row font)
LCDLarge_24pt (a large LCD style 4 row font)
LCDLarge_52pt (a large LCD style font)*
* Note that to save program memory the LCDLarge_52pt font is disabled by default. You will need to edit the MemorySave.h file to enable it.
Code: Select all
HCTFT.Print(TextString[])TextString[] is a string of text.
Code: Select all
HCTFT.Print(Value)Value is a signed integer number of type long.
Code: Select all
HCTFT.Print(value, digits, DecimalPlaces);value is a signed floating point number of type float
digits is the number of digits (including decimal places) to crop the number to. Maximum is 10 digits
DecimalPlaces is the number of decimal places to crop the number to.
Code: Select all
HCTFT.Bitmap(Cols, ByteRows, BitmapData[]);Cols is the X axis dimension of the bitmap in pixels.
ByteRows is the Y axis dimension of the bitmap in 8 pixel chunks.
BitmapData[] is a 1 dimensional array of type const byte containing a 2 colour bitmap image. Each byte of the array represents on 8 pixel column of the bitmap.
Code: Select all
HCTFT.Bitmap2TFT(FileName[]);FileName[] is the file name of the bitmap file. The file name must be 8 characters or less.
Note: To save memory the SD card library functions have been disable by default. To use this function you will need to edit the MemorySave.h file to uncomment the following line:
Code: Select all
#define SDCARDCode: Select all
HCTFT.Scale(Scale);Scale is the multiplication factor of the X and Y dimension of the text or graphics.
Code: Select all
HCTFT.Max_X();Code: Select all
HCTFT.Max_Y();
Code: Select all
/* FILE: HCTFT_Example_1_Random_Graphics
DATE: 17/06/15
VERSION: 0.1
AUTHOR: Andrew Davies
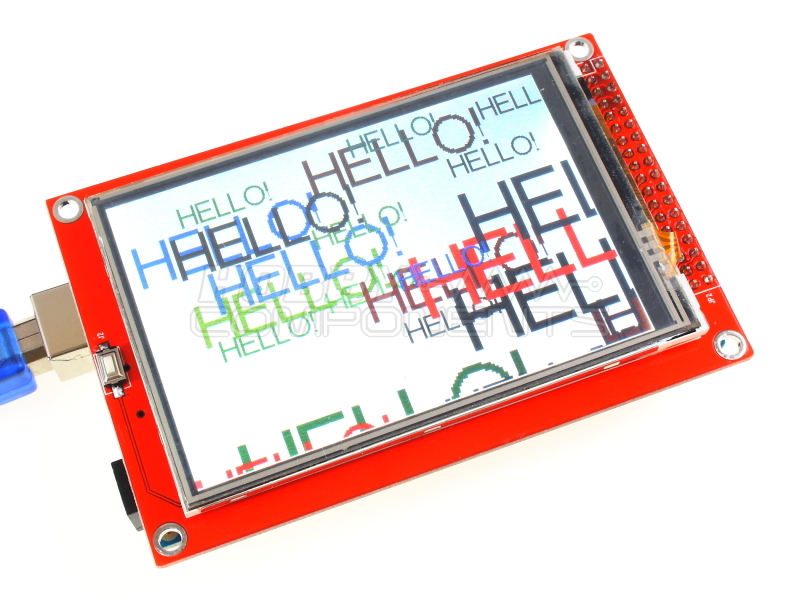
This example will output graphics, text and bitmap data randomly to the screen.
The sketch demonstrates the use of these vairous functions including how to
set their colours and positions on the screen.
To use this sketch you will need to uncomment the appropriate initialisers below
for your particular display.
IF YOU GET AN OUT OF MEMRY COMPILE ERROR:
Library support for TFT screens can be quite memory intensive. If you are using
an UNO you may find that you will get and out of memory compile error. To get the
sketch to compile you will need to edit the MemorySave.h file in the HCTFT folder
to free up some memory.
You may copy, alter and reuse this code in any way you like, but please leave
reference to HobbyComponents.com in your comments if you redistribute this code.
This software may not be used directly for the purpose of selling products that
directly compete with Hobby Components Ltd's own range of products.
THIS SOFTWARE IS PROVIDED "AS IS". HOBBY COMPONENTS MAKES NO WARRANTIES, WHETHER
EXPRESS, IMPLIED OR STATUTORY, INCLUDING, BUT NOT LIMITED TO, IMPLIED WARRANTIES OF
MERCHANTABILITY AND FITNESS FOR A PARTICULAR PURPOSE, ACCURACY OR LACK OF NEGLIGENCE.
HOBBY COMPONENTS SHALL NOT, IN ANY CIRCUMSTANCES, BE LIABLE FOR ANY DAMAGES,
INCLUDING, BUT NOT LIMITED TO, SPECIAL, INCIDENTAL OR CONSEQUENTIAL DAMAGES FOR ANY
REASON WHATSOEVER.
*/
/* Include the HCTFT library */
#include "HCTFT.h"
/* Example bitmap */
const PROGMEM byte Tiny_Logo_Resistor[] =
{
0xC0, 0xE0, 0x30, 0x30, 0xF0, 0xE0, 0xC0, 0xC0, 0xC0, 0xC0, 0xC0, 0xC0, 0xC0, 0xC0, 0xC0, 0x00, 0x00, 0x00, 0x00, 0x80, 0xE0, 0x38, 0x0E, 0x07, 0x1E, 0x78, 0xE0, 0x80, 0x00, 0x00, 0x00, 0x00, 0xC0, 0x70, 0x1C, 0x07, 0x0F, 0x3C, 0xF0, 0x80, 0x00, 0x00, 0x00, 0x00, 0x80, 0xF0, 0x3C, 0x0F, 0x07, 0x1C, 0x70, 0xC0, 0x00, 0x00, 0x00, 0x00, 0x80, 0xE0, 0x78, 0x1E, 0x07, 0x0E, 0x38, 0xE0, 0x80, 0x00, 0x00, 0x00, 0x00, 0xC0, 0xC0, 0xC0, 0xC0, 0xC0, 0xC0, 0xC0, 0xC0, 0xC0, 0xE0, 0xF0, 0x30, 0x30, 0xE0, 0xC0,
0x00, 0x01, 0x03, 0x03, 0x03, 0x01, 0x00, 0x00, 0x00, 0x00, 0x00, 0x00, 0x00, 0x00, 0x03, 0x0F, 0x3C, 0x38, 0x0E, 0x03, 0x00, 0x00, 0x00, 0x00, 0x00, 0x00, 0x01, 0x07, 0x1E, 0x38, 0x1C, 0x07, 0x01, 0x00, 0x00, 0x00, 0x00, 0x00, 0x00, 0x03, 0x0E, 0x38, 0x38, 0x0E, 0x03, 0x00, 0x00, 0x00, 0x00, 0x00, 0x00, 0x01, 0x07, 0x1C, 0x38, 0x1E, 0x07, 0x01, 0x00, 0x00, 0x00, 0x00, 0x00, 0x00, 0x03, 0x0E, 0x38, 0x3C, 0x0F, 0x03, 0x00, 0x00, 0x00, 0x00, 0x00, 0x00, 0x00, 0x00, 0x01, 0x03, 0x03, 0x03, 0x01, 0x00,
};
/* Options used to select one of the demos */
#define LINE 0
#define RECTANGLE 1
#define FONT 2
#define BWGRAPHIC 3
/* Uncomment one of the lines below to to create an instance of the TFT library
to match your screen */
//HCTFT HCTFT(ELECFREAKS_2_4_WITH_TFT01_UNO); // Elecfreaks 2.4" TFT (HCARDU0083)
//HCTFT HCTFT(ELECFREAKS_3_2_WITH_TFT01_MEGA); // Elecfreaks 3.2" TFT with ILI9481 contoller (HCARDU0097)
//HCTFT HCTFT(ELECFREAKS_3_2_9341_WITH_TFT01_MEGA); // Elecfreaks 3.2" TFT with ILI9341 controller (HCARDU0097)
//HCTFT HCTFT(MCUFRIEND_2_4_UNO); // McuFriend 2_4" TFT (HCARDU0095)
//HCTFT HCTFT(MCUFRIEND_3_5_MEGA); // Mcufriend 3.5" TFT (HCARDU0096)
void setup()
{
/* Initialise the TFT library */
HCTFT.Init();
/* Select one of the libraries fonts and seed the Arduino random function*/
HCTFT.SetFont(LargeProp_25pt);
randomSeed(analogRead(0));
}
/* Main sketch */
void loop()
{
int Index;
/* Draw lots of lines in random places and colours */
for (Index = 0; Index < 500; Index++)
{
Draw_Graphic(LINE);
}
HCTFT.Clear();
/* Draw lots of rectangles in random places and colours */
for (Index = 0; Index < 100; Index++)
{
Draw_Graphic(RECTANGLE);
}
HCTFT.Clear();
/* Draw the word HELLO in random sizes, places and colours */
for (Index = 0; Index < 100; Index++)
{
Draw_Graphic(FONT);
}
HCTFT.Clear();
/* Draw an example graphic in random sizes, places and colours */
for (Index = 0; Index < 150; Index++)
{
Draw_Graphic(BWGRAPHIC);
}
HCTFT.Clear();
}
/* Function to randomly draw a graphic or test */
void Draw_Graphic(byte Type)
{
/* Create some random X/Y coordinates and colours */
int X1 = random(HCTFT.Max_X());
int X2 = random(HCTFT.Max_X());
int Y1 = random(HCTFT.Max_Y());
int Y2 = random(HCTFT.Max_Y());
byte Red = random(255);
byte Green = random(255);
byte Blue = random(255);
byte Scale = random(4);
/* Get the foreground colour */
HCTFT.SetFG(Red,Green,Blue);
/* Select a graphic function to draw */
switch(Type)
{
/* Draw a random line */
case(LINE):
HCTFT.Line(X1,Y1,X2,Y2);
break;
/* Draw a random solid or outlined rectangle */
case(RECTANGLE):
if(random(2))
{
HCTFT.Rect(X1,Y1,X2,Y2,OUTLINE);
}else
{
HCTFT.Rect(X1,Y1,X2,Y2,SOLID);
}
break;
/* Print the text HELLO! in random sizes */
case(FONT):
HCTFT.Scale(Scale);
HCTFT.Cursor(X1,Y1);
HCTFT.Print("HELLO!");
break;
/* Draw the example bitmap in random sizes */
case(BWGRAPHIC):
HCTFT.Scale(Scale);
HCTFT.Cursor(X1,Y1);
HCTFT.BWBitmap(84, 2, Tiny_Logo_Resistor);
break;
}
}
The library files can be downloaded from github here:
https://github.com/HobbyComponents/HCTFT
Or directly from this forum: