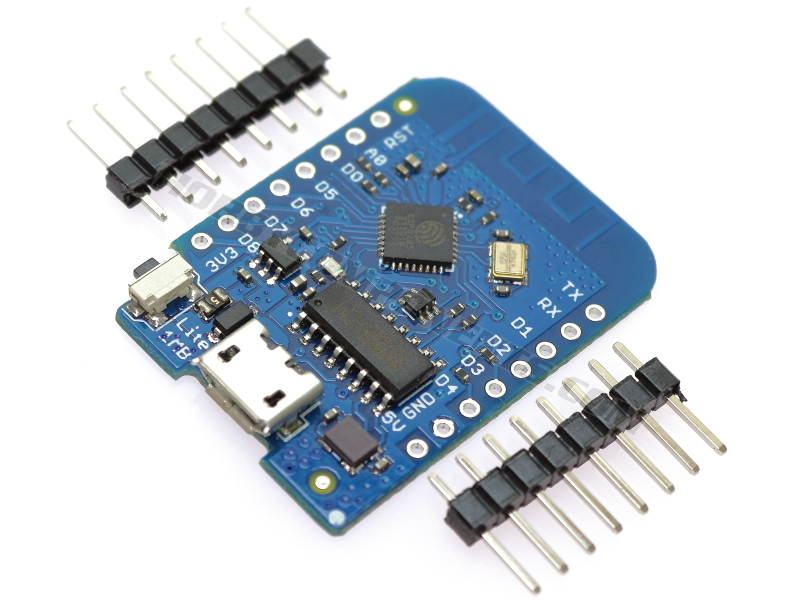

The WeMos D1 mini Lite is a miniature wireless 802.11 (Wifi) microcontroller development board. It turns the very popular ESP8285 wireless microcontroller into a fully fledged development board. Programming the D1 mini lite is as simple as programming any other Arduino based microcontroller as the module includes a built-in microUSB interface allowing the module to be programmed directly from the Arduino IDE (requires the ESP8285 support to be added via board manager) with no additional hardware.
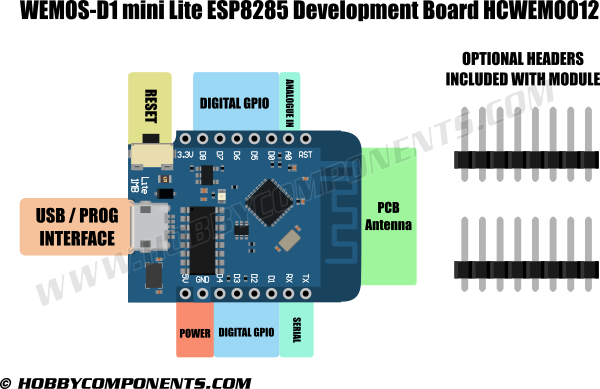

Product code: HCWEMO0012
Microcontroller: ESP-8266EX
Operating Voltage: 3.3V
Digital I/O Pins: 11
Analog Input Pins: 1 (Max input: 3.2V)
Clock Speed: 80MHz
Flash: 1M bytes
Length: 34.2mm
Width: 25.6mm
Weight: 10g
Pin Function ESP-8266 Pin
TX TXD TXD
RX RXD RXD
A0 Analog input, max 3.3V input A0
D0 IO GPIO16
D1 IO, SCL GPIO5
D2 IO, SDA GPIO4
D3 IO, 10k Pull-up GPIO0
D4 IO, 10k Pull-up, BUILTIN_LED GPIO2
D5 IO, SCK GPIO14
D6 IO, MISO GPIO12
D7 IO, MOSI GPIO13
D8 IO, 10k Pull-down, SS GPIO15
G Ground GND
5V 5V -
3V3 3.3V 3.3V
RST Reset RST

Code: Select all
/* Blink example - HobbyComponents.com */

#include <ESP8266WiFi.h>

#define PIN 2 // Flash the LED connected to GPIO2

void setup()
{
  pinMode(PIN, OUTPUT); // Set the pin to an output
}

void loop()
{
  digitalWrite(PIN, LOW); // Turn the LED on
  delay(1000); // Wait for a second
  digitalWrite(PIN, HIGH); // Turn the LED off
  delay(1000); // Wait for another second
}
Drivers
The Wemos D1 mini pro includes a CH340 USB to UART IC to allow it to be programmed directly from the USB port of a computer.
USB 32/64 bit drivers for Microsoft Windows computers can be downloaded from our Github page here:
https://github.com/HobbyComponents/CH340-Drivers
Windows Installation Instructions
Drivers are available in the link below. Simply download and unzip them, connect your D1 Mini to your computer with a USB cable and when the new hardware is detected, point the wizard to the folder you just unzipped to and it should install without any problems.
Windows Driver here
MAC installation instructions
New code signed version confirmed to work with 10.12 Sierra
Download the driver (you must be logged in to download).
Once downloaded, double-click the zip file to unzip it.
Run installer found in that folder.
If asked to restart, do not restart just yet.
Now restart your Mac.
Adding board support to the Arduino IDE
Latest versions of the Arduino IDE allow for adding additional 3rd party board support directly from within the Arduino IDE. To add support simply open up your Arduino IDE and follow these steps:
1) Go to File->Preferences
2) In the window that opens up find the text box labelled 'Additional Boards Manager URLs:' and paste the following line into it:
http://arduino.esp8266.com/stable/packa ... index.json
Then click the OK button to close the window.
3) Next go to Tools->Board->Boards Manager
4) In the window that opens up look for the entry titled 'esp8266 by ESP8266 Community Version x.x.x' and click on it.
5) In the bottom right-hand corner of this entry you should now see an install button appear. Click on this and board manager will then automatically add all the files necessary to support the ESP8266. This may take a few minutes depending on the speed of your internet connection.
Additional steps for D1 Mini Lite
At the time of writing this guide (06/06/17) the current version of the ESP8266 board files (2.3.0) does not include board descriptions for the D1 Mini lite. However, this can be added by overwriting the boards.txt file for the ESP8266 be following the steps below:
1) Download the boards.txt file below:
2) Navigate to the following folder:
C:\Users\<username>\AppData\Local\Arduino15\packages\esp8266\hardware\esp8266\2.3.0
3) Overwrite the boards.txt file found in this location with the file you have just downloaded.
4) Restart the Arduino IDE.
Under tools->board you should now see additional board options for various ESP8266 devices including one called 'WEMOS D1 mini Lite'.
Disclaimer: Libraries, example code, and diagrams are provided as an additional free service by Hobby Components and are not sold as part of this product. We do not provide any guarantees or warranties as to their accuracy or fitness for purpose.
Descriptions and diagrams on this page are copyright Hobby Components Ltd and may not be reproduced without permission.