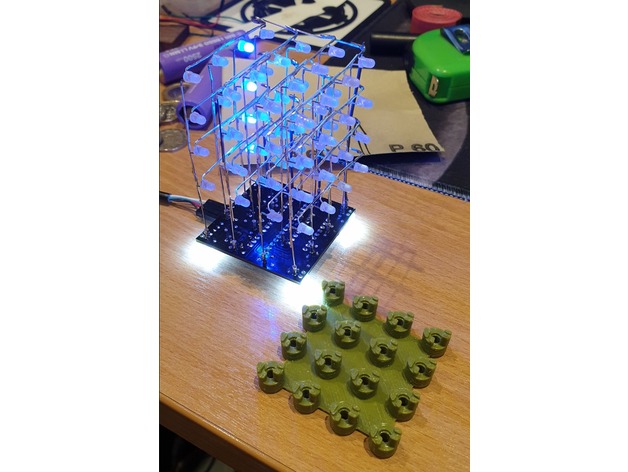

LED light cubes are a hugely popular and fun project and with this kit you will have all the parts to build your very own. Building on the popular 8x8x8 cube kit (HCKITS0022), we decided to create an easy to build through-hole version for those of you who are better suited to this kind of soldering. The kit includes all the components necessary to build the Arduino compatible driver base board and 64 3mm LEDS to build a 4 x 4 x 4 cube.
The kit is available with 4 different LED colour versions:
64 x 3mm BLUE LEDs (HCKITS0041)
64 x 3mm GREEN LEDs (HCKITS0042)
64 x 3mm RED LEDs (HCKITS0043)
64 x 3mm WHITE LEDs (HCKITS0044)
Demonstration Video
The kit also comes preloaded with several demo patterns so once constructed simply connect the cable and your cube will immediately jump into life. But the fun doesn't have to stop there. If you like to tinker the kit is compatible with the Arduino development environment and we have also created an Arduino library which is available for download from the software section of our support forum. This library makes it as easy as possible to create your own LED cube sketches and add your own patterns.
What you get in the kit:
4x4x4 Cube PCB
64 x LEDs (kits available in blue, red, white)
16 x 100ohm Resistors
4 x 220ohm Resistors
1 x 10K Resistor
1 x Tact Switch
4 x White 5mm LEDs
3 x 100nF Capacitors
2x 20pF Capacitors
1x ATMega328 IC
1x 16MHz Crystal
1x ULN2003 IC
Plus: A USB to serial interface cable that can be used to power and reprogram the completed cube.
Please note that some familiarity in soldering is recommended to construct this kit. A soldering iron, solder and some tools will also be required.


Build Guide
A full build guide is available on our blog here.
Customer contributions:
For customers with access to a 3D printer user SpoonUnit has very kindly created a jig for accurately bending the legs of the LEDs to create the cube. This can be found on thingiverse here:
https://www.thingiverse.com/thing:3612602

FAQ:
How to I reprogram the cube?
To reprogram the cube you will need to have a copy of, and be familiar with the Arduino IDE which is available for free download via arduino.cc:
https://www.arduino.cc/en/Main/Software
Connect the cube to your computer via the supplied serial cable as follows:

An Arduino library and example sketches are available for download via the software section of this forum here: http://forum.hobbycomponents.com/viewto ... =58&t=1860
When programming the cube via the Arduino IDE select "Arduino Nano" as the board type. If using the supplied serial cable you will also need to manually reset the cube when the sketch is uploaded. To do this reset the cube via its reset button as soon as the Arduino IDE finishes compiling your sketch and reports that it is "Uploading" it to the cube.
WINDOWS 8/VISTA/10 USERS:
The latest Prolific of the drivers for the supplied cable breaks compatibility with newer version of windows. If you have problems getting the driver to work please see the forum post for this cable for a solution.
http://forum.hobbycomponents.com/viewto ... =79&t=1815