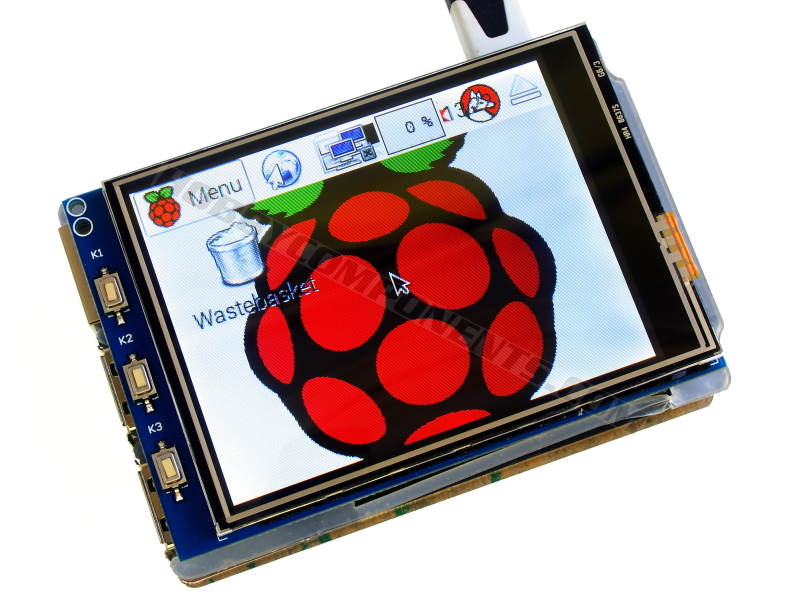

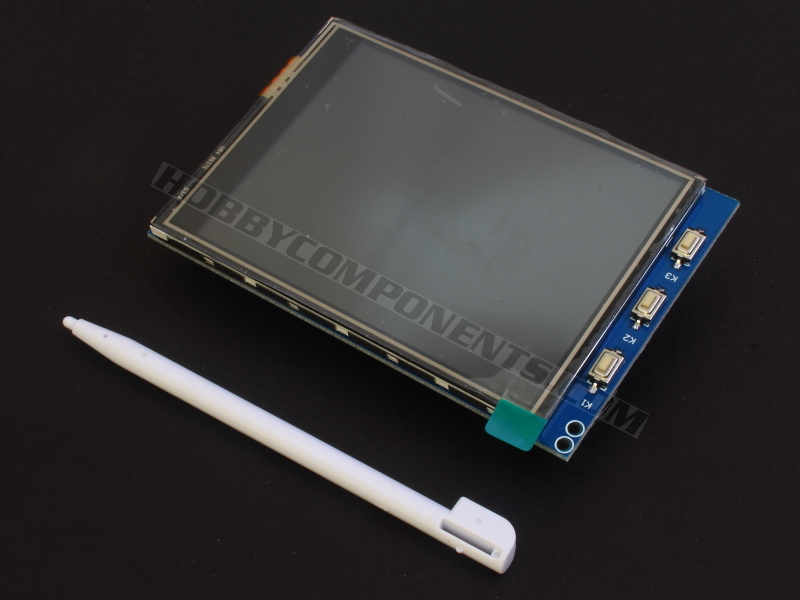
This serial SPI touch screen has a resolution of 320 x 240 pixels and includes a restive touch interface. Specifically designed for the ResbarryPi is can be plugged straight on to the Pi's GPIO header with no additional soldering or wiring required. Included with this item is a stylus pen for use with the resistive touch screen.

Product code: HCRASP0008
Number of colours: 65536
Backlight: LED
LCD inteface: SPI
Dimensions (display): 65mm x 48mm
Dimensions (bezel): 78mm x 55mm
Please note:
1) Your raspberry Pi will not automatically detect this display and will therefore need to be configured to use it.
2) If using this module to display your Raspberry Pi's GUI desktop, due to its relatively low resolution some applications may not work.
3) I guide to configuring the Raspbian operating system can be found on our support forum. This guide has only been confirmed to work with version 2 Raspberry Pi's
Configuring your Raspberry Pi:
This guide has only been tested on the Raspberry Pi model 2. To follow the guide you will need to have your Raspberry Pi model 2 connected to a monitor, keyboard and mouse and must also have a working internet connection.
WARNING: We recommend starting from a clean Raspbian Jessie image which can be downloaded form the Raspberry Pi website here:
https://www.raspberrypi.org/downloads/raspbian/
We have based this guide on the noobs version. Follow the installation guide via the link to burn the image to an SD card.
If you plan to modify an existing image we strongly recommend that you take a backup of your image first. We cannot accept any responsibility for loss of data from failing to follow this recommendation.
Once you have a working image the first step is to boot in to the desktop and then in a terminal window issue the following command:
Code: Select all
sudo nano /boot/cmdline.txt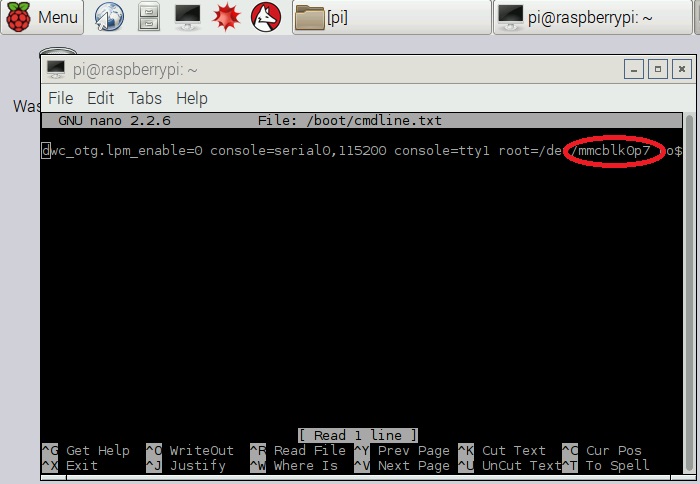
To exit the editor press the CTRL+X keys on your keyboard.
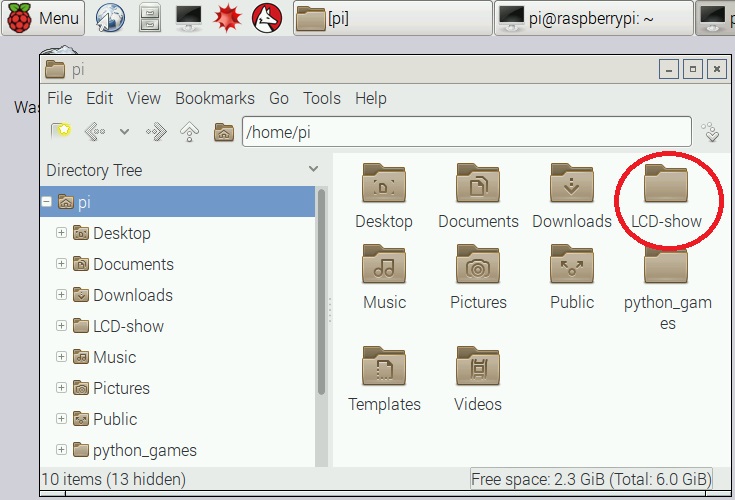
Next download the tar attachment available at the bottom of this post and uncompress it to the home directory on your Raspberry Pi. In your home directory you should now have a directory called LCD-show:
From your terminal window CD into the directory with the following command:
Code: Select all
cd /LCD-showThe execute the following script:
Code: Select all
sudo ./LCD32-showYour Raspberry Pi should now reboot. With luck the display should switch to the module and continue to boot in to the desktop. However it is likely that the Pi will fail to boot and will report a kernel panic. If this happens don't worry, just reboot your Pi and when you see the recovery prompt hit the shift key on your keyboard.
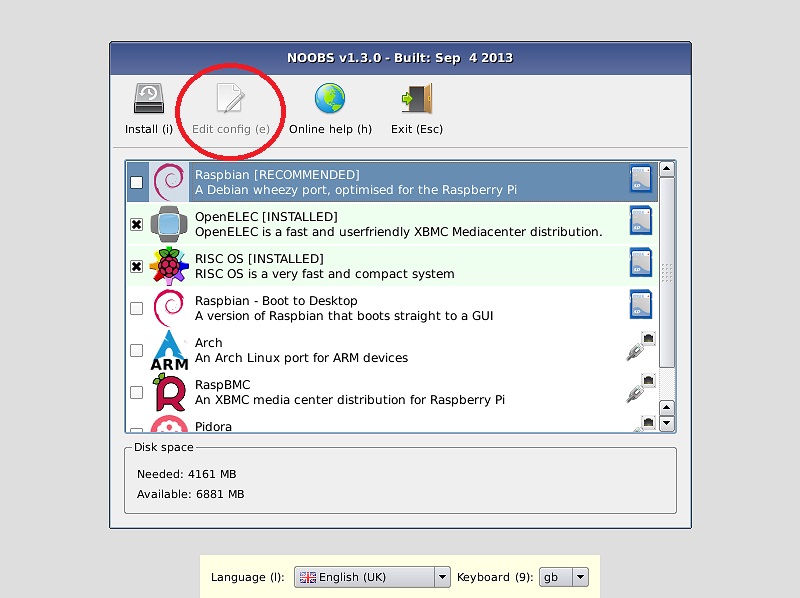
When the Pi boots into the recovery screen select the 'Edit Config' button at the top of the window.
In the window that opens up select the 'cmdline.txt' tab:
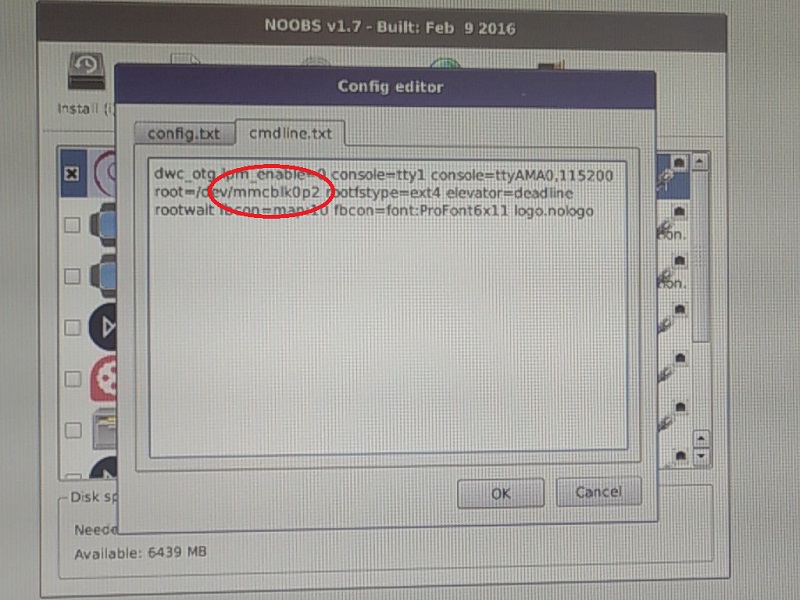
In the text area of the window find the portion of text as highlighted in the above image. Change the number on the end to match the one you made of note of previously.
Click the OK button to close the window and to save this change.
Then click the exit button in the recovery screen to reboot your Pi.
If everything has worked your Rapsberry Pi should reboot and will display the desktop using the modules display instead of your monitor.
